This blog post presents several ways and concepts on tempo automation in Ableton Live. It sets focus on how to do smooth tempo transitions in Ableton’s Session View. This can be automated via the “Automate Tempo BPM” Max for Live device. This device is part of the “AutoMATE Global Control Pack 1”.

How to change and automate tempo in Ableton Live
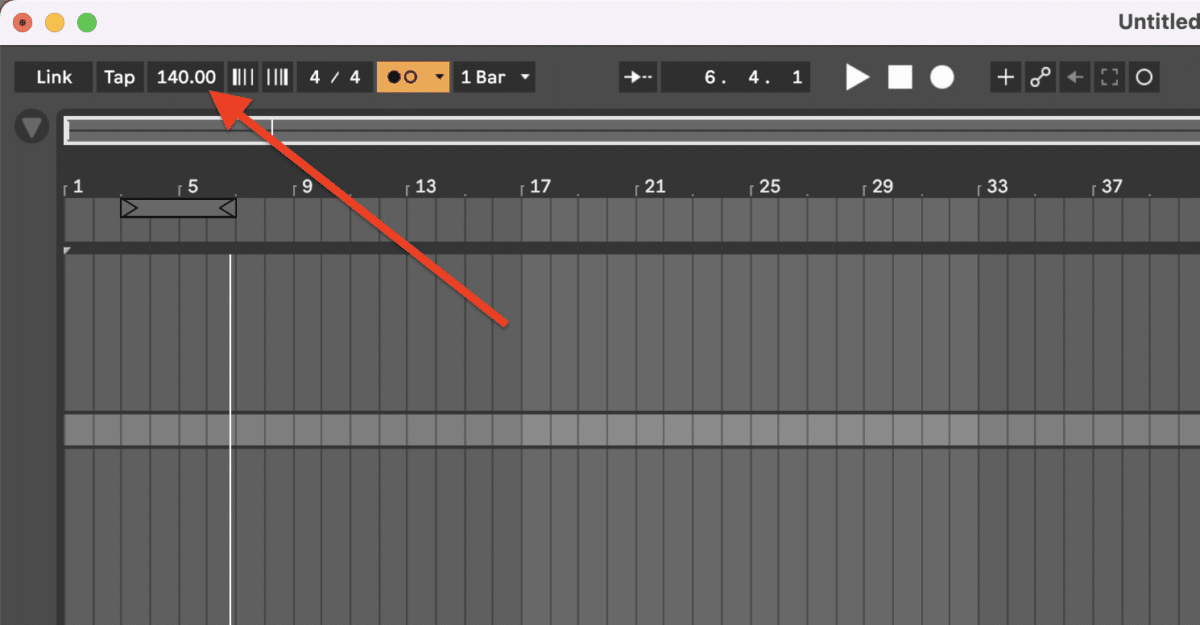
Your Tempo dictates the speed of your music. This is one of the most important musical factors in terms of the energy and feel of a composition. The tempo is measured in “Beats Per Minute” also known as “BPM”. In Ableton Live you can choose your Tempo at the top left of the screen.
Many songs will stay the same Tempo throughout the composition. However, you may make the musical choice to speed up a part of your arrangement (known as an accelerando) or slow down a part of your arrangement (known as a Decelerando). In addition, you may also want to change tempo over time between different pieces within a single Ableton project file. To do this you can automate your tempo in Arrangement View.
How to automate tempo in Arrangement View
First you simply right click on the tempo box and choose “Show Automation”.
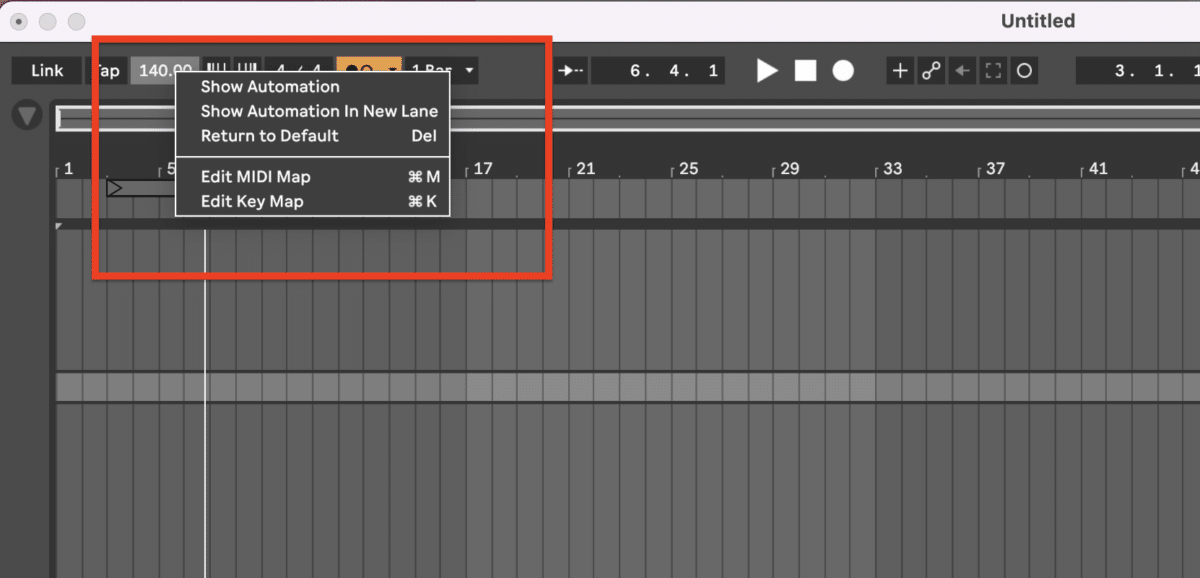
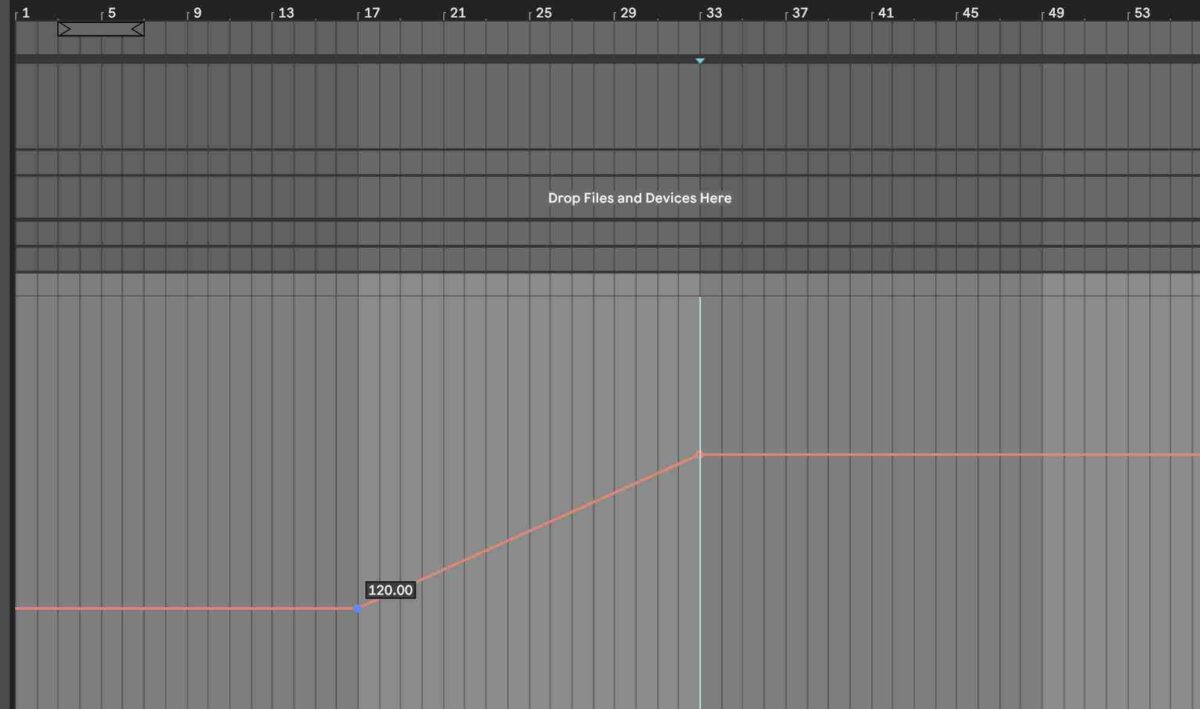
This will open up the automation lane on your master channel. It will allow you to draw in your changes to the Tempo. Moreover, you click on the red line to create a new node which you can then move to different Tempos. If you right click on an individual node you can choose “Edit Value” to enter in a specific Tempo more easily.
How to Automate tempo in Session View in Ableton
You can also automate your Tempo in Session View with the help of the Automate Tempo BPM Device. This device allows you to automate your Tempo from within a specific clip in Session View— something not possible with the Global Tempo knob or native Ableton Plugins. Additionally, you can just drag and drop the Automate Tempo BPM device on a MIDI Track in Ableton Live.
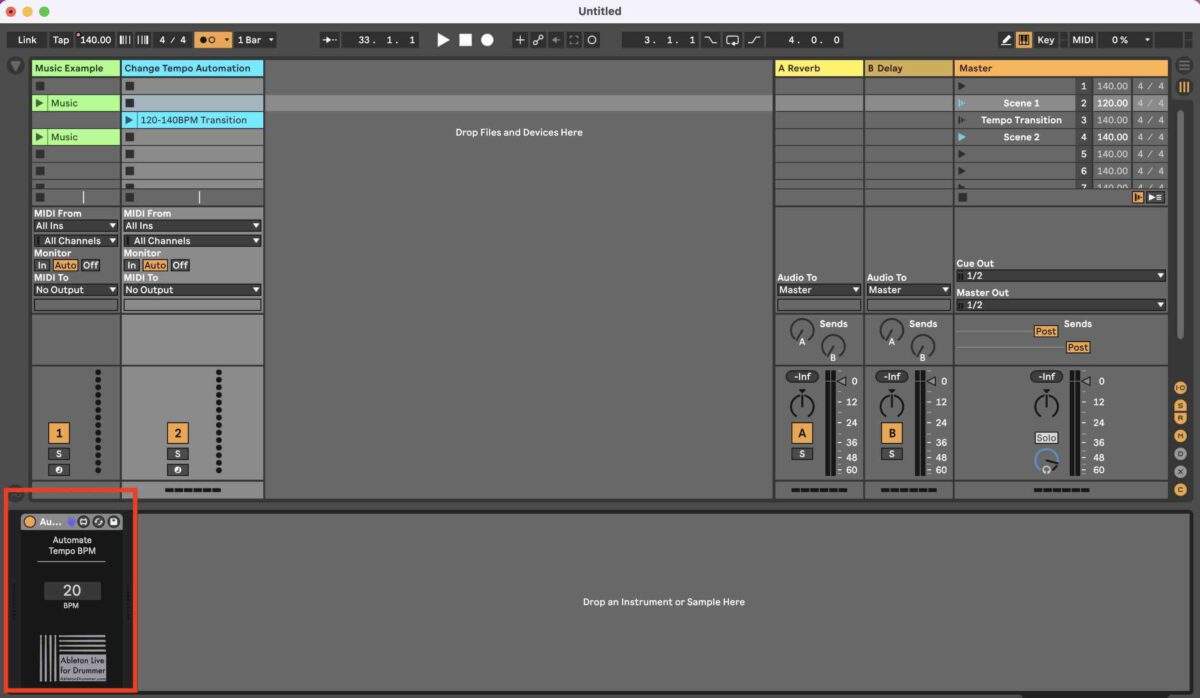
- Create a MIDI clip on the track with the Automate Tempo BPM Device.
- Double-click your MIDI clip to open up the piano roll and the control panel.
- Go to the left of the piano roll and open the “Envelopes” Tab.
- Choose “Show all envelopes” from the drop down menu.
- Choose “Automate Tempo BPM” from the left dropdown menu.
- Choose “BPM” from the right dropdown menu.
Now you can automate the Automate Tempo BPM Device with the automation lines inside of your clip. You can do this by clicking on the lines to create movable nodes, or drawing in the automation lines using Draw Mode (B).
HOW TO APPLY DYNAMIC TEMPO CONTROL WITH ABLETON LIVE!
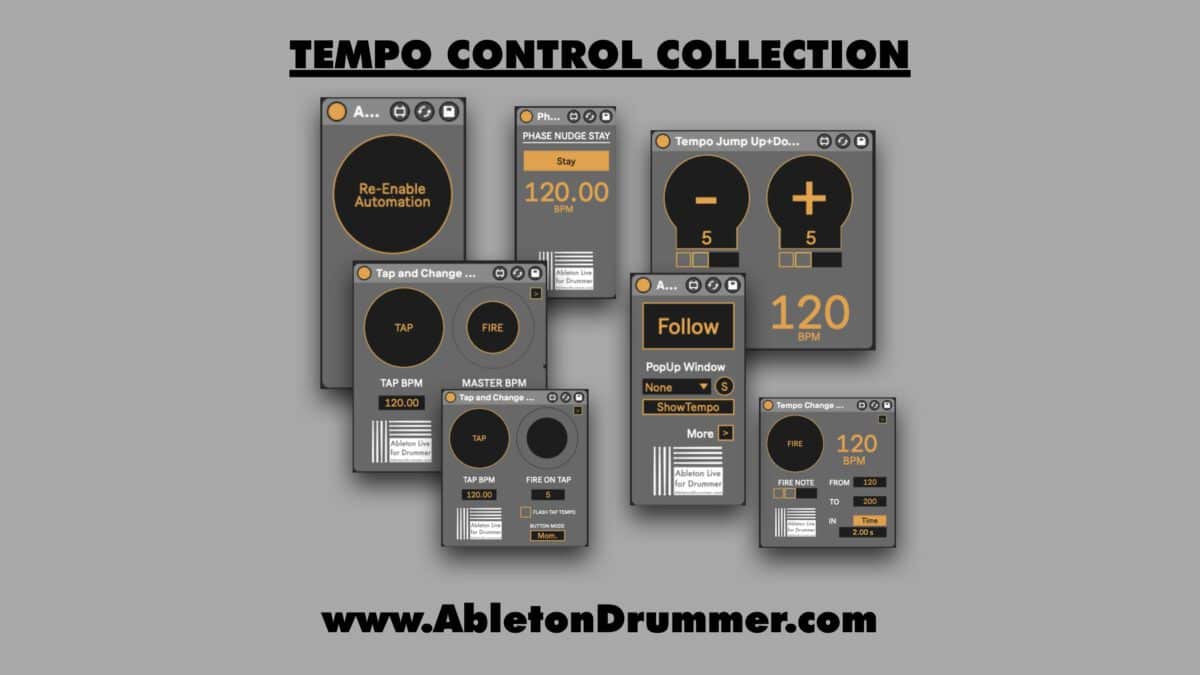
CHECK OUT THE TEMPO CONTROL COLLECTION HERE!
How to apply a smooth tempo transition between Scenes in Ableton Session View
You can also pair this BPM automation feature with Scene Follow Actions. This allows you to create Scenes which change tempo on their own!
How to set a Scene Tempo in Ableton Live
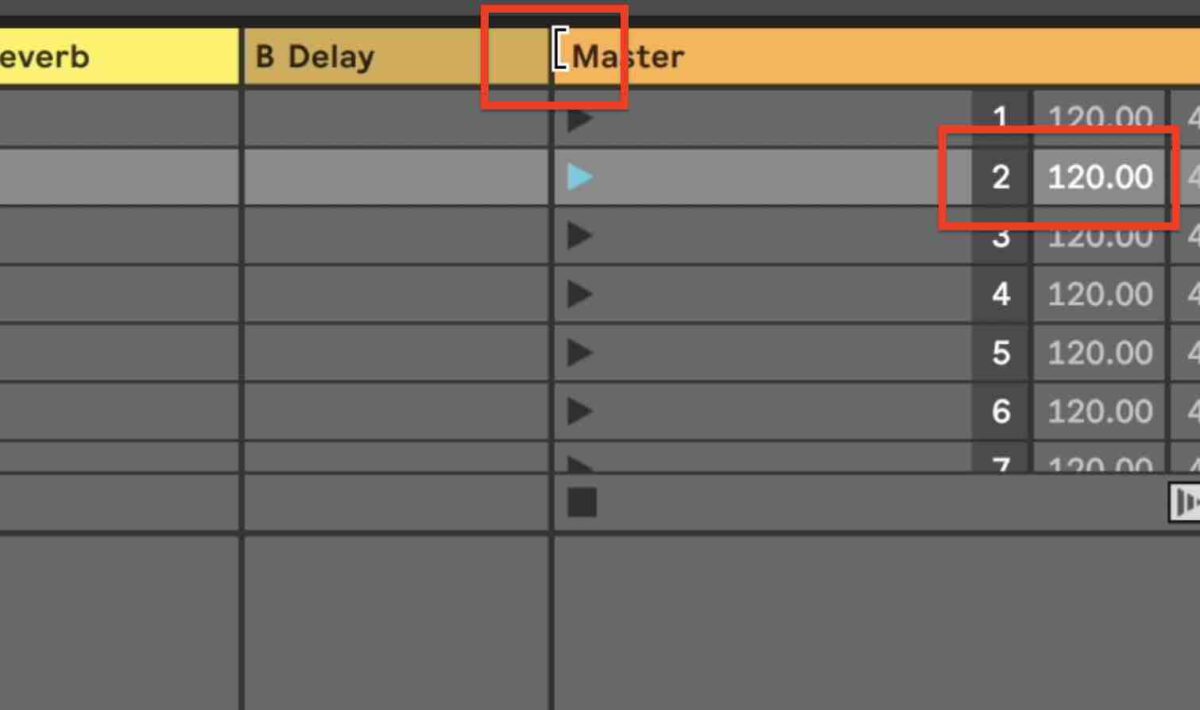
You can set a Scene Tempo for every Scene in Ableton Live. Just drag the Scene View to the left to make the Scene Tempo field visible. You can do that by hovering on the top left of the Master track. Your mouse cursor will change to a bracket symbol and you can now hold click + drag to the left.
You are now able to put in BPM values in the “Scene Tempo” field for every scene in Ableton Live.
How to set up a Scene Follow Action in Ableton Live
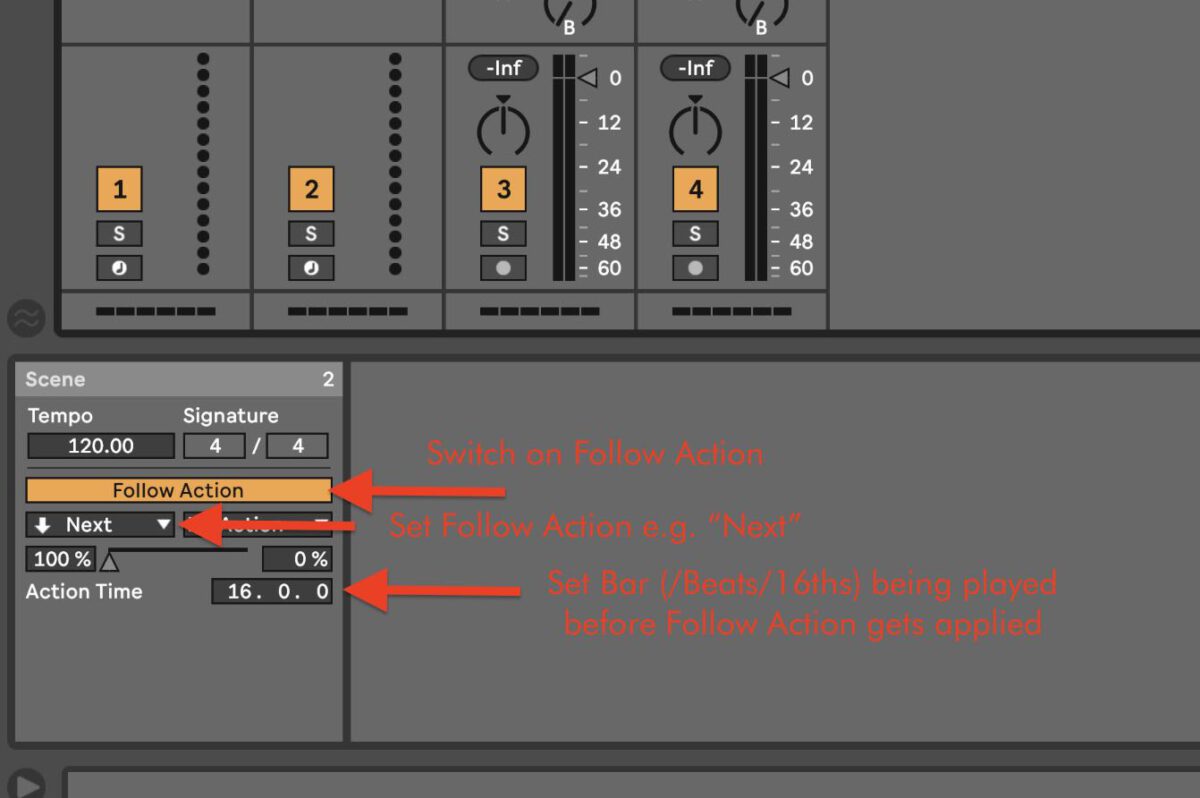
Since Ableton Live Version 11 you are able to set up Scene Follow Actions. This way you can set up scene to play the next scene after a pre set amount of bars. Just double-click on a Scene to open up the Scene Follow View. The Scene Follow View will display on the bottom left corner.
Scene Follow actions will trigger a whole scene. If there are no clips present on track scene slots have “Stop” Buttons per default. If stop buttons are triggered the clips from the former scene will be stopped playing. However, as we only want to trigger a tempo change but not stopping playing clips we would need to remove all stop buttons for the track and clip slots.
How to remove Stop buttons to keep clips playing in Session View
Scene Follow actions will trigger a whole scene. If there are no clips present in a clip slot they will have a “Stop” Buttons per default. If stop buttons are triggered the clips from the former scene will be stopped playing. However, as we only want to trigger a tempo change but not stopping playing clips we would need to remove all stop buttons for the track and clip slots. This only applies to the Audio and MIDI tracks we want to keep playing during the tempo transition. You can remove (and add) Stop buttons via “CMND / CNTRL + E” or via -right-click and click on “Remove Stop Button”.

How to set up a tempo ramp in Session View
We are now able to set up a tempo ramp and automatic transition. This allows movement from one Scene’s BPM to another tempo with all the techniques explained before. Let’s say we want to have a smooth transition of 2 bars from Scene 1 playing at 120 BPM to Scene 2 playing at 140 BPM. Setting this up would work as followed:
- Set tempo in “Scene Tempo” field for Scene 1 + 2 (120Bpm + 140BPM)
- Create a new scene between the two existing scenes
- Create a MIDI Track and place the “Automate Tempo BPM” M4L device on this track
- Create a MIDI Clip in the transition scene and set up an automation in the envelope section from 120 to 140BPM over 2 bars
- Delete the “Stop Buttons” on the tracks clip slots you want to keep the music and midi playing during the tempo transition
- Set up “Scene Follow Action” to have the scenes going to the next one automatically.