In Ableton Live’s Session View you can create and trigger short phrases of MIDI or Audio called clips. For Doing and performing you can add whole tracks and tunes as ‘clips’ in the Session View. Whether you’re producing music in the studio or performing arrangements live on stage it is important to keep these clips organized.
Ableton provides many opportunities to play, stop, and move around these clips with software tools like Follow Actions, or hardware controllers like the Ableton Push 2 or the APC series. Triggering lots of different clips and moving through a long list of tracks can easily become unwieldy and confusing. You might feel lost: which tracks and clips did you already play?

Fortunately, AbletonDrummer.com offers several incredibly useful tools for knowing exactly what has been played and what hasn’t. You can use those Max for Live tools to automatically change played clips – colour, de-activate or delete. This will help you stay organized and focused on making incredible music.
How to auto re-colour played clips
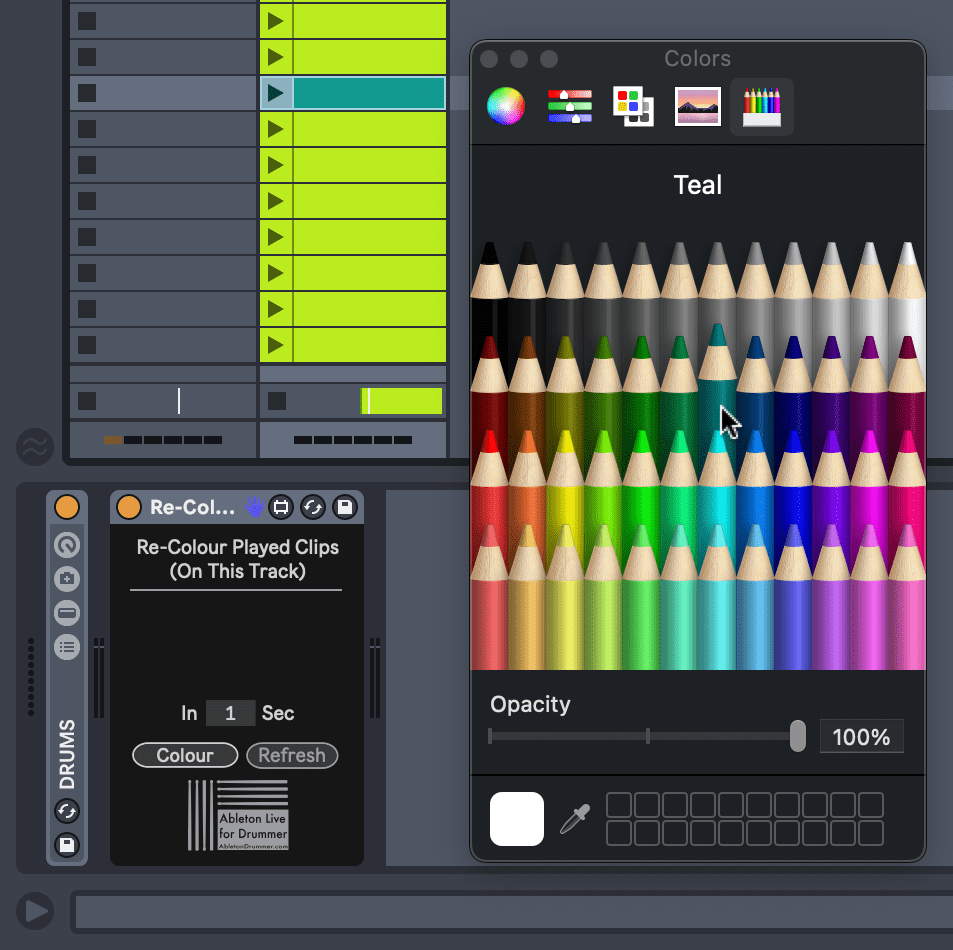
With the re-colour played clips device you can keep track of clips. You can give them their own unique colour. This way you can see which tracks you already played. The interface allows you to get very specific with the exact color you’d like.
First, place the re-Colour Played Clips Device directly onto your track. Next play your first clip. Now, each time a new clip is played, the previously played clip will change to your chosen color.
How to automatically deactivate played clips
If you don’t want to introduce anything new to the colour scheme of your Ableton project then you can simply deactivate the clip. This will make the clip gray and keep it from playing . You will need to activate it again. You can re-activate your clip by clicking on it and pressing 0.
Just like the re-color device you simply place the De-Activate Played Clips Device directly onto your track. Next play your first clip. Now, each time a new clip is played, the previously played clip will become deactivated.

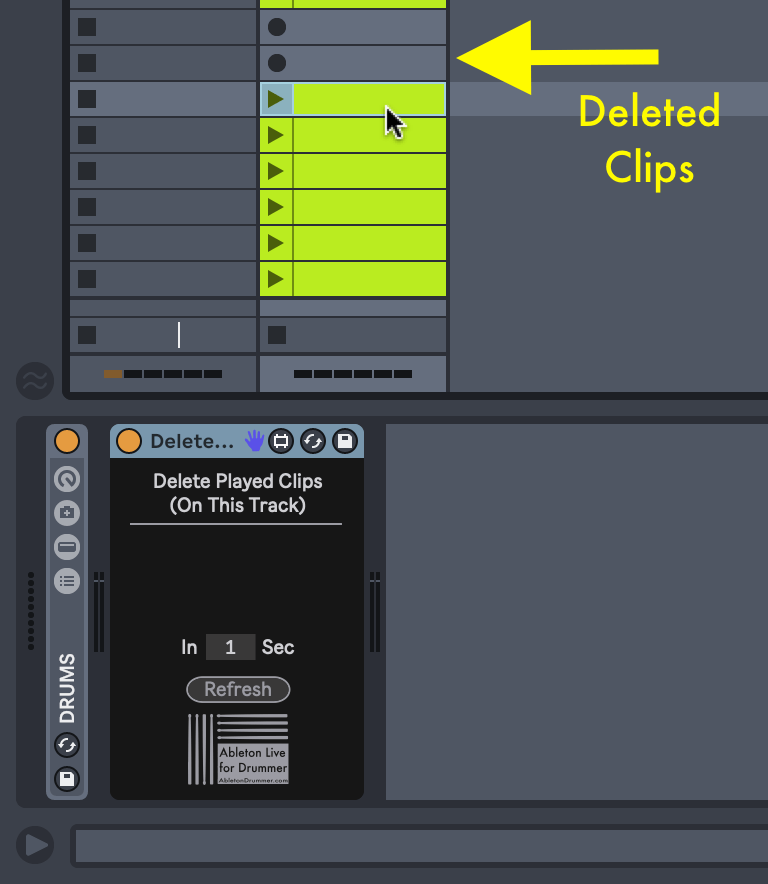
How to automatically delete played clips
Finally, if you simply don’t want to bother with new colors or deactivations, you may prefer to automatically delete the clip altogether. For that you can use the Delete Played Clips Device. This will completely delete a played clip as soon as the next clip begins playing.
First place the Delete Played Clips Device directly onto your track. Next play your first clip. Now, each time a new clip is played, the previously played clip will be deleted.
If you want to automatically change played clips colour, activation status or to delete them you want to check out this Max for Live pack. This will help you to stay on top on large Ableton Sessions with a lot of songs.
If you have never used Max for Live before, don’t worry – it is as easy as using Ableton’s native effects. You just need to drag and drop the Max for Live devices on the particular tracks in Ableton Live. You won’t need any programming skills.
I have released many Max for Live devices for Ableton Live. My approach is to fix missing features I find useful to have. This way I can help people to focus on performance and to improve their workflow. I want you to be able to focus more on flow and performance instead of overthinking things.