

What is MIDI Velocity?
MIDI stands for “Musical Instrument Digital Interface”. This refers to anything that converts some sort of musical instrument, whether hardware or software, into data that can be read by software such as Ableton Live or any other modern digital audio workstation (“DAW”) midi velocity control.
One of these MIDI signals known as “Velocity” is designed to mimic how hard an instrument is played. In the case of drumming MIDI Velocity is attempting to turn the velocity of your drum stick or hand into data that the DAW can understand. The faster your stick or hand moves, the harder it will strike your drum, which on acoustic kits leads to not only different levels of loudness, but also different levels of timbre and other subtle effects.
Quiet and loud in MIDI language
MIDI Velocity represents the velocity of your stick or hand by turning pressure signals from your pads or triggers into a signal with a range from 1 – 127. Bigger numbers represent more velocity. In musical terms a velocity around 1 would represent playing quietly at piano or pianissimo. A velocity of around 127 would represent playing loudly at forte or fortissimo.
MIDI Velocity Control While Playing into Ableton Live
The most direct way to manipulate your MIDI Velocity while playing is to make changes to how hard you are hitting your e-drums or triggers. More advanced e-drums and triggers will typically be very sensitive to pressure so that they can send this MIDI Velocity information directly to your DAW when you record.
If you’re using an Ableton Drum Rack to play out samples you can even adjust how much a sample’s gain will be influenced by the incoming MIDI Velocity information. Higher values on this knob means the sample’s gain is more sensitive to your incoming MIDI Velocities.

How to set a fixed velocity in Ableton Live
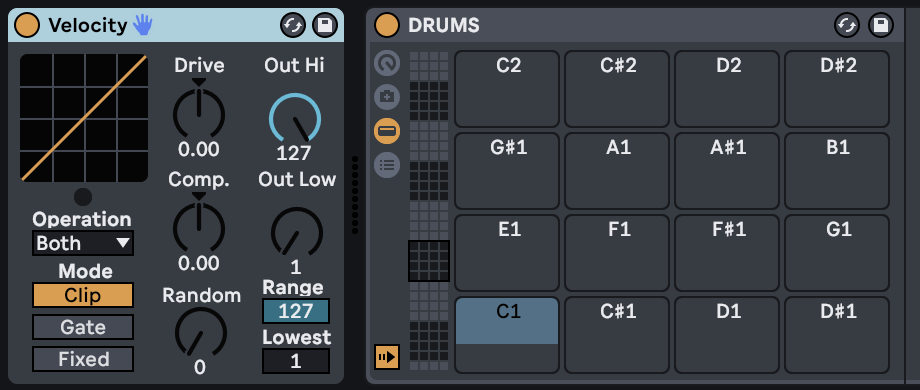
Unfortunately, not all e-drums or triggers are pressure sensitive. That means some hardware will send a Fixed Velocity to your DAW. This is completely ignoring how much pressure or velocity is going into your playing. If you’re ok with a fixed velocity but you would like to change your output value then you’re in luck. Ableton already has a built-in MIDI Device simply called Velocity. This device will allow you to change the MIDI Velocity signals coming into Ableton.
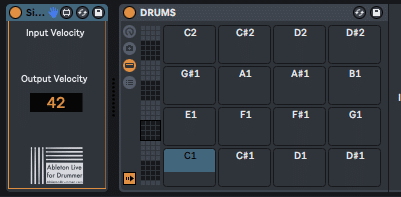
If you would like an even more simple solution for turning all of your incoming MIDI notes into one specific MIDI Velocity then you can use the Simple Pre-Set Velocity MIDI Device. This will convert all incoming MIDI signals to that specific value.
How to set a threshold for MIDI notes in Ableton Live
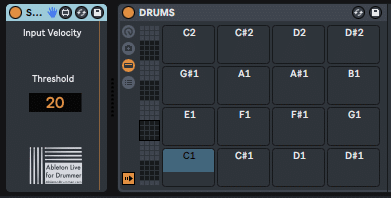
If you want to keep some variation in your MIDI Velocities while you’re playing, but you simply don’t want to hear notes under a certain velocity threshold then you can use the Simple Threshold MIDI Device from AbletonDrummer.com which will block all MIDI notes under the set value.
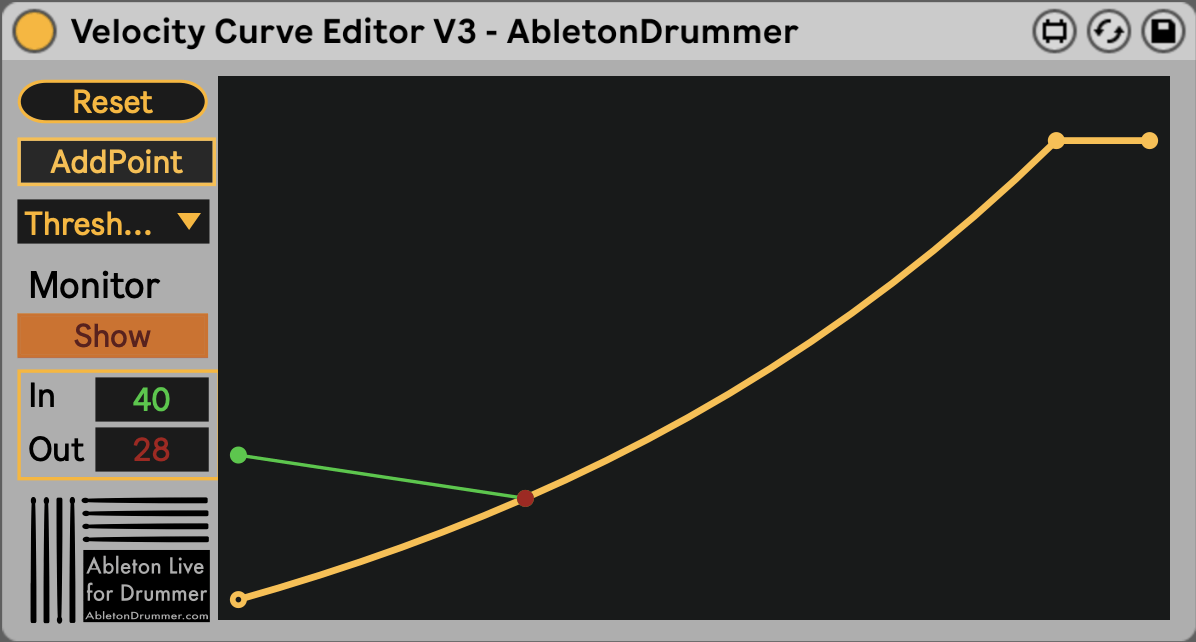
How to define MIDI Velocity via curve
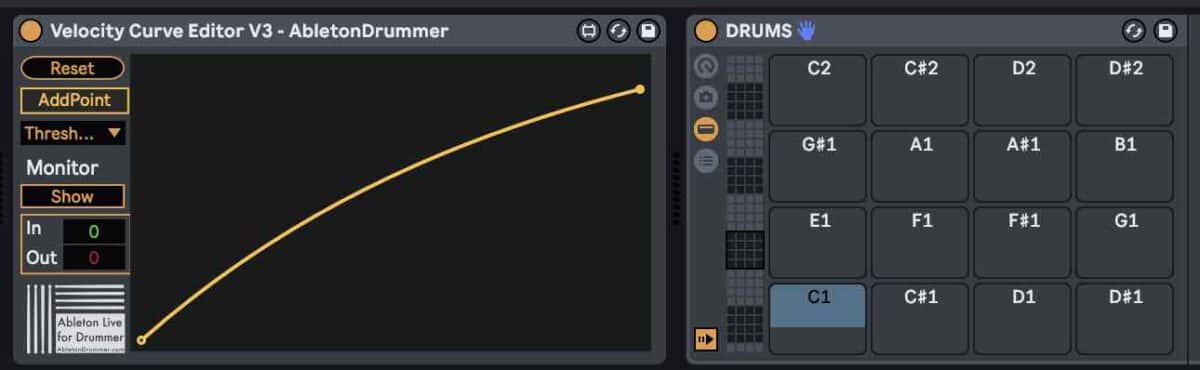
For even more in depth control of your MIDI velocity while you’re playing you may wish to dial in your ideal range of MIDI Velocities. Your playing style, your hardware, your software, and many other factors may demand that a very specific range of MIDI Velocities be used. For this you can use the Velocity Curve Editor MIDI Device from AbletonDrummer.com. This device allows you to adjust a MIDI Velocity Curve which will help you find an ideal range of velocity values for your playing.
Velocity Control After Recording into Ableton
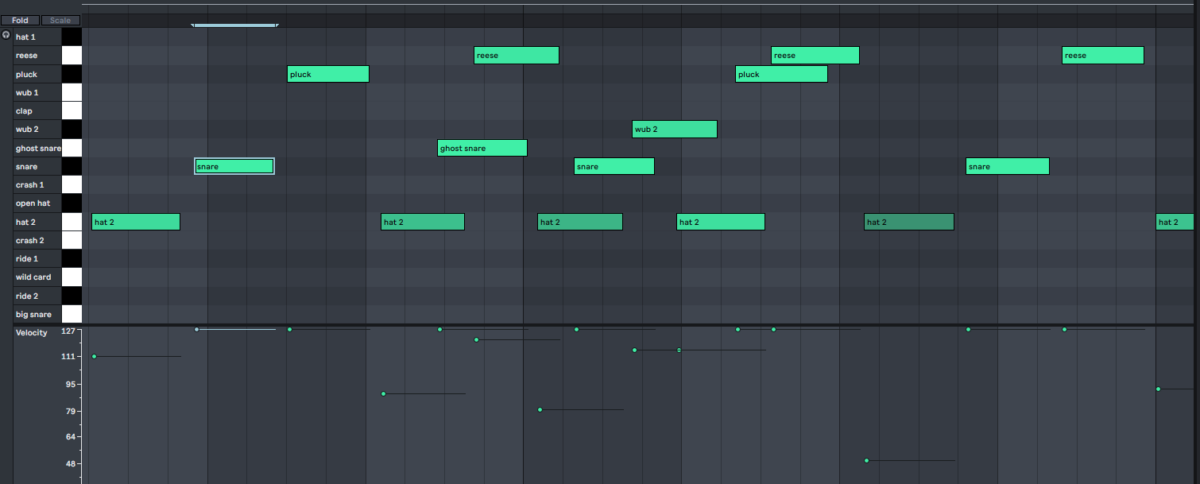
Ableton also allows you to make adjustments to your MIDI Velocity after you have recorded your parts. All of the Velocity effects shown here can be applied to recorded MIDI as well. But you can as well edit MIDI notes in the clip view. If you double click the top of your MIDI clip Ableton will open your piano roll to reveal all of your MIDI notes. You can hold CMD on Mac/CTRL on PC and then click and drag on an individual MIDI note to change its MIDI Velocity. You’ll see this change reflected on the bottom of the piano roll where the MIDI Velocity is represented by small moveable nodes. You can also directly click and drag these nodes up or down to change the MIDI Velocity of an individual MIDI Note.
How to use Ableton’s Draw Mode for editing MIDI notes
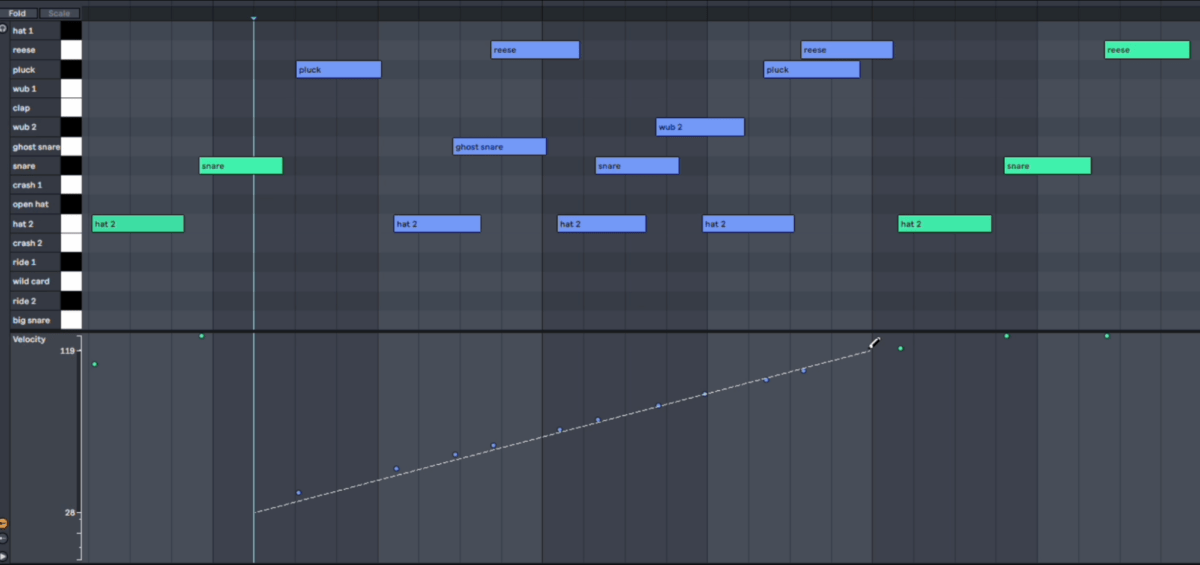
For even more control you can press B on your keyboard to activate Draw Mode (make sure computer MIDI Keyboard Mode is deactivated on the top right of the window before using that shortcut). Draw Mode will allow you to make sweeping changes across many MIDI Velocities in a row. While in Draw Mode you can also hold option on Mac/alt on PC and then click and drag to create slopes for your velocities creating crescendo or decrescendo effects.
How to add some randomization to MIDI notes in Ableton Live
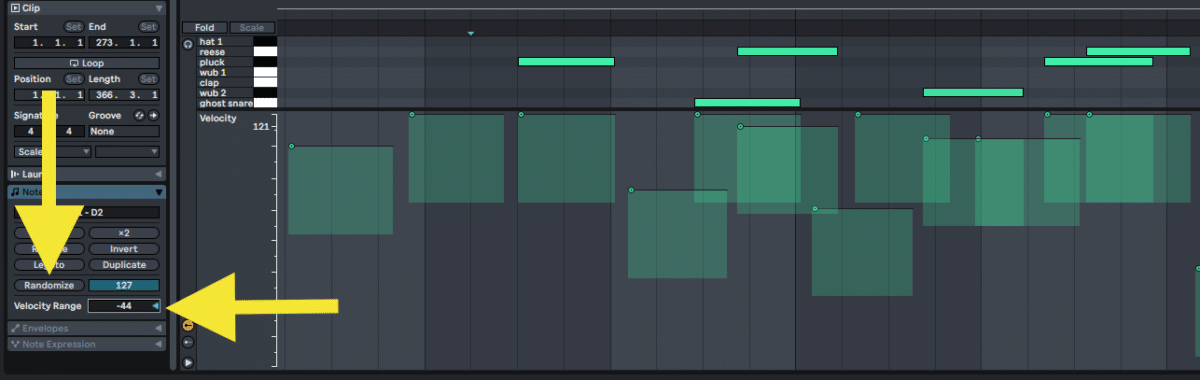
You can add some randomization to your MIDI Velocity after you’ve recorded by simply clicking on the randomize button to the left of your MIDI Velocity nodes. This will randomly assign a new value to all of your MIDI Velocities. You can change the parameter next to the randomize button to dial in the amount of random change you’d like.
For more randomization you can change the value of the Velocity Range. You will find this in the same MIDI Control Panel to the left of your Piano Roll. This will give your midi notes a randomized range which is either higher or lower than the original MIDI Velocity.
Advanced MIDI Velocity Control in Ableton Live
On an actual acoustic drum kit changing the velocity will not only change the volume of your note. It it will also change the timbre and character of the note. With Max for Live MIDI Devices you can also go beyond just changing the gain of each note to include changes in sound, texture, timbre and more based on the MIDI Velocity information.
Velocity to Note Length
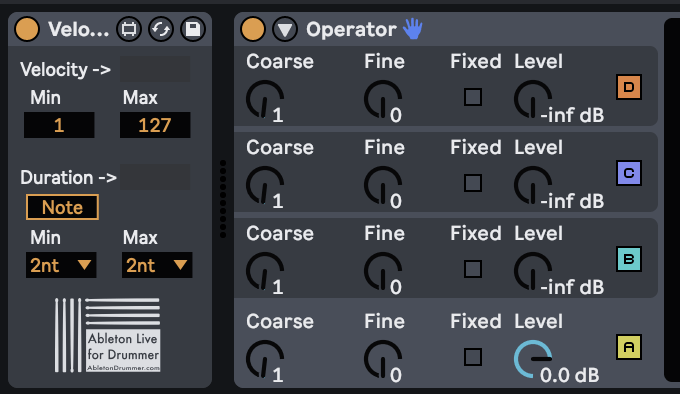
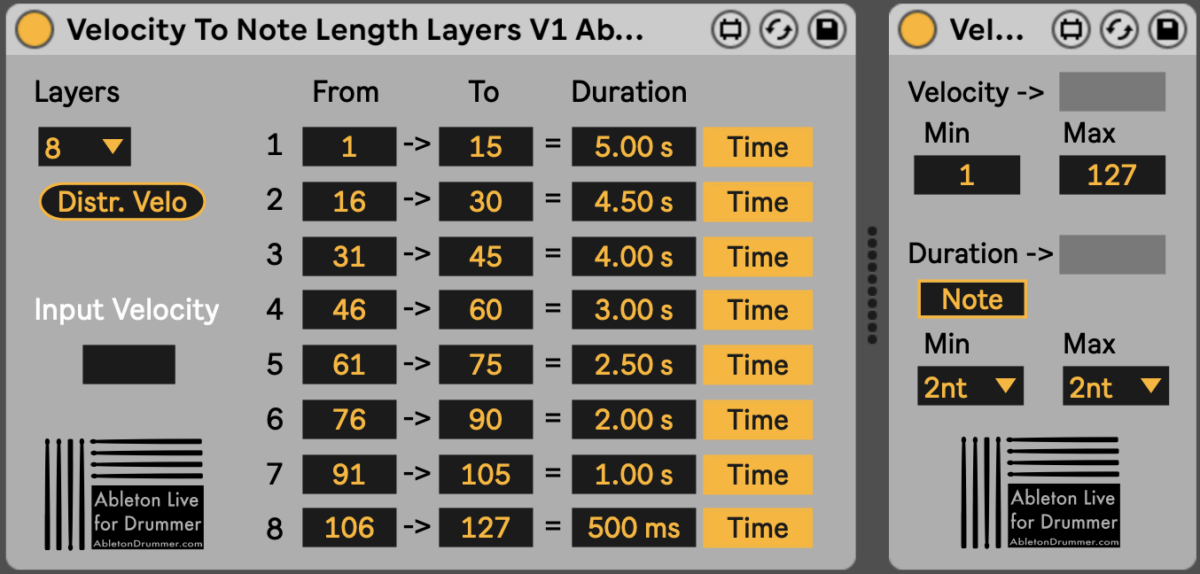
For example you can use the Velocity to Note Length Scale Midi Device. This will use your MIDI Velocity information to change the duration or length of the notes you are playing. You can output short staccato notes when you play with a low velocity. You can play long legato notes when you play with a higher velocity. Very helpful for more musically dynamic playing beyond changing the volume. You simply choose your range of MIDI Velocities and choose your range of note length duration.
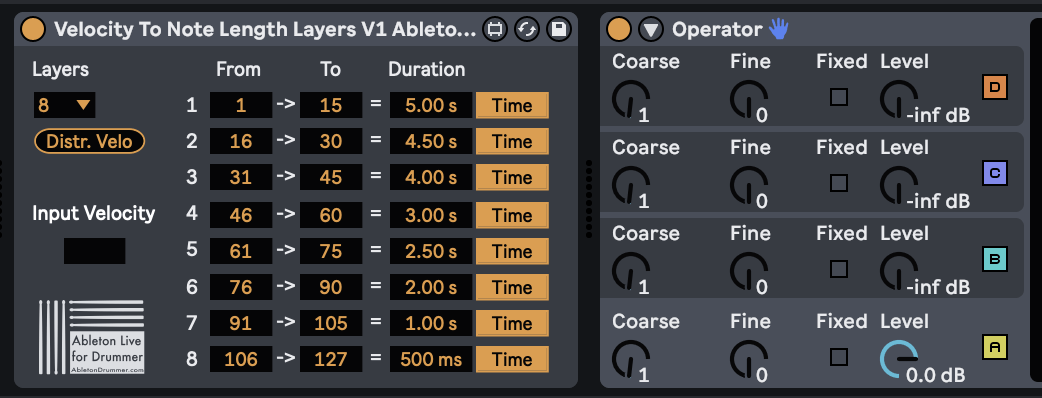
If a gradient slope relationship between your MIDI velocity and your note duration isn’t working for you then you may benefit from having specific layers or fixed ranges of MIDI Velocities that will lead to specific durations of note length. The Velocity to Note Length Layers MIDI Device from AbletonDrummer.com lets you do just that.
You simply select the ranges you would like to use to create a “velocity layer”. You are able to assign a specific note length duration for each of those velocity layers. This will allow you to only play specific note lengths that you’ve chosen which are triggered by specific velocity ranges.
How to apply MIDI velocity to the Filter Cutoff in Ableton Live
You can also use your incoming MIDI velocity to change the timbre of the sounds in your Ableton Drum Rack. You are able to map your incoming MIDI Velocity signals to the Filter Cutoff in your Sampler. This will allow you to change how much filtering is done to the sample. This is based solely on the velocity of your playing.
To do this click the control tab of your sampler, turn on your filter, and adjust the Velocity Parameter in the filter labeled “vel”. You can experiment with different cutoff values, different filter types, and different filter velocity parameter amounts to dial in how much your MIDI Velocities affect the filtering of your sample.

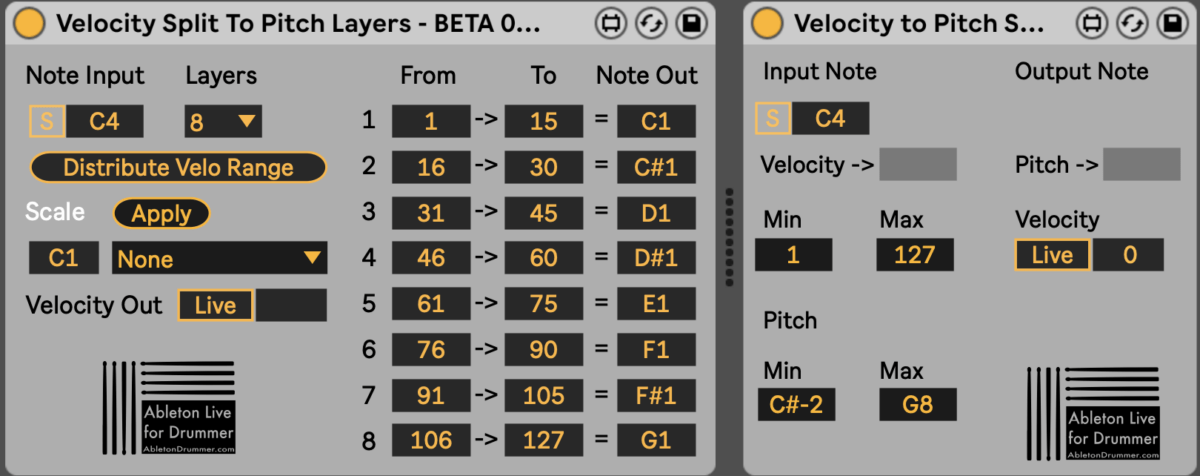
How to control the pitch of notes via MIDI velocity
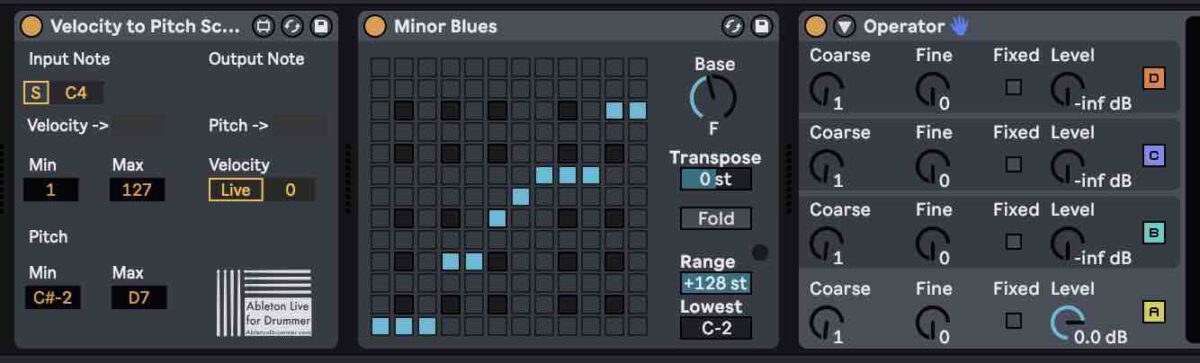
If you would like your MIDI Velocity to control which note or pitch is triggered in your instrument then you can do that in Ableton Live too. The Velocity to Pitch Scale MIDI Device allows you to pair incoming MIDI Velocity signals to a set range of pitches. This means that when you change the velocity of what you are playing you will also change the pitch of the notes. This can lead to some incredibly musical and creative results.
All you need to do is define the range of the velocities you would like to use and then define the range of the pitches you would like them to trigger. This can be especially useful when paired with Ableton’s Scale MIDI Device to ensure all of your MIDI notes will always be in the desired key.
How to set velocity ranges to play certain MIDI note pitch in Ableton Live
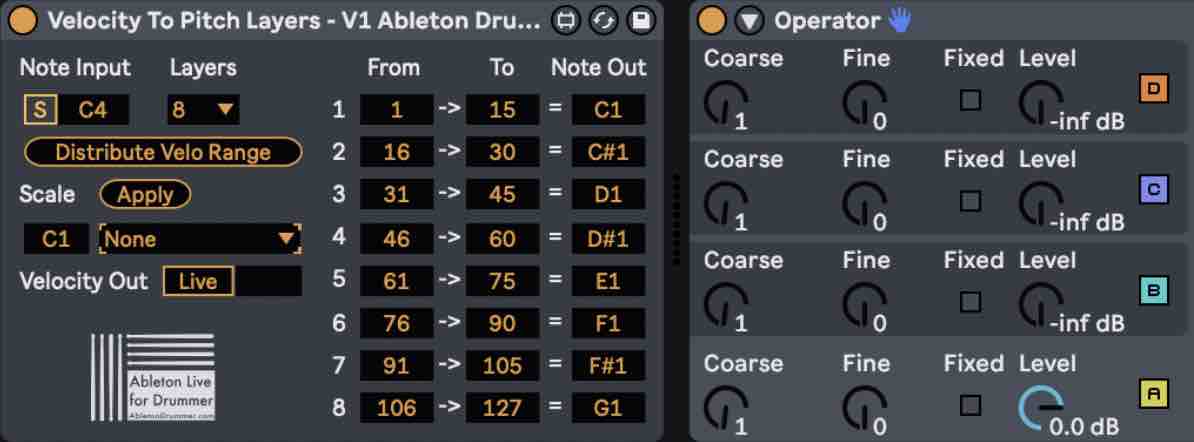
If you’re looking for even more specificity in how your MIDI Velocity relates to which pitches you’re triggering then you may want to have certain ranges or layers of your velocity trigger just one specific note. You can do this too by using the Velocity to Pitch Layers MIDI Device. To give you one example:
- have all of your quiet pianissimo playing trigger one specific pitch
- your medium mezzoforte notes trigger another specific pitch
- your loud fortissimo playing trigger yet another specific pitch
You can do this with up to eight layers of velocity.
All you need to do is choose the velocity range for each layer. You can then choose which pitch each layer will trigger. The device even has a Scale feature built in so you can choose your key signature right in the device.
Velocity Pack Walk-Through Tutorial
VELOCITY PACK ALL SINGE DEVICES AND MANUALS
Velocity to Note Length
2 devices to be able to control the MIDI note length via the velocity.
Velocity to Note Pitch
2 devices to be able to control the MIDI note pitch via the velocity.
Velocity Curve V3
In depth velocity control/re-scaling.
Simple Threshold
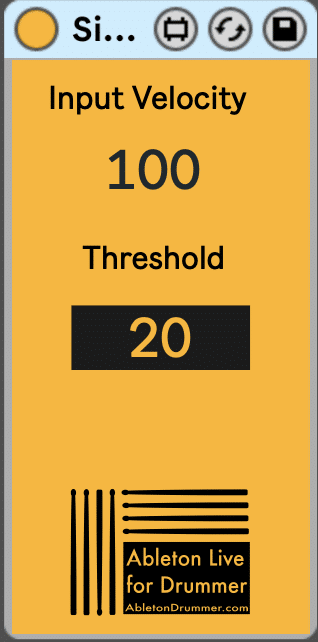
Setting up a velocity gate for MIDI notes to only pass through if going over a certain velocity value.
Simple Pre-Set Velocity
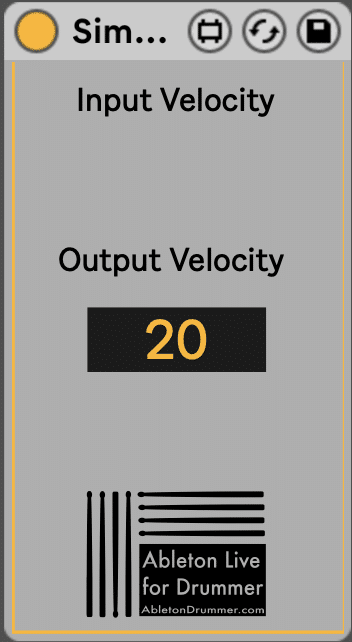
Will set all MIDI notes to a certain velocity.