AutoTune hardware controlled via Ableton Live
MIDI messages from Ableton Live can control the Tascam TA 1 VP (get yours here!) *affiliate link*. This will become handy if you want to automate preset changes and select different presets functions like pitch scales. For live performances the TA 1 VP is the go-to hardware solution for effects like Auto-Tune. You are able to automate and access parameters like Auto-Tune via Ableton Live.
To keep things access-able and easy to control via a nice user interface I developed a Max for Live device.
GET THE MAX FOR LIVE DEVICE FOR THE TA 1 VP HERE:
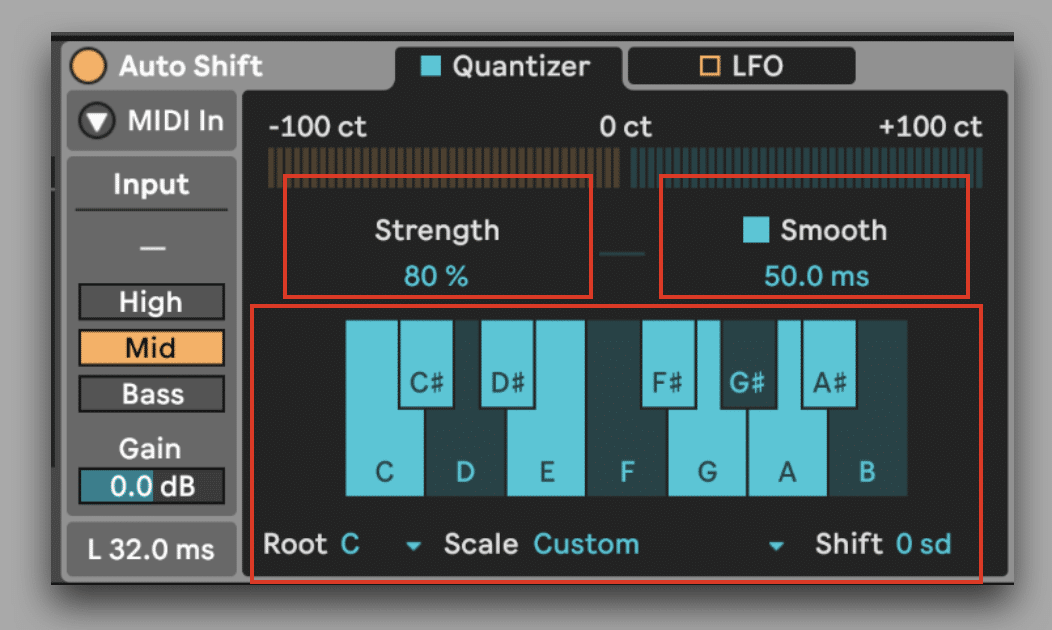
Find out more about Ableton’s new Audio Effect Auto Shift which lets you
How to set up the TA 1 VP to be able to change presets via MIDI
You will first need to activate the TA 1 VP to be able to receive and listen to MIDI Program Changes. This way you are able to select different presets via MIDI being send from Ableton Live.
- Press “SETUP”
- Press “PAGE” several times to get to the MIDI page
- MIDI PROGRAM CHANGE is not active and set to “OFF” per default. Change this to “ON” by pressing one of the back/forward buttons to select this field. Move the dial to change it to “ON”.
- If you are using separate MIDI port here for the TA-1VP you can leave this to OMNI, it will listen to all 16 MIDI Channels. If you want to only sent on a certain MIDI Channel select this on the top row which says MIDI CHANNEL.

How to set up the TA 1 VP to change parameters like “AUTO TUNE” via MIDI
You will need to set each parameter to a certain MIDI Continuous Control (CC) number to be able to control this via Ableton Live.
- Go To the MIDI Controllers page (press set-up and multiple times on PAGES)
- Here you can select the parameter you want to control via MIDI CC on the left.
- Select the right side (which shows “OFF” or a number) via one of the arrow buttons.
- You can now select a MIDI CC# you want to use for sending value changes.

Send MIDI from Ableton Live to the Tascam TA 1 VP
You will need to make a physical MIDI connection from your computer / MAC to the TA 1 VP. You can use a dedicated USB-to-MIDI cable for that. Most external sound cards have a 5-pin MIDI OUT socket which you can connect to the 5-pin MIDI IN of the TA 1 VP via a standard MIDI cable.
You can now create a MIDI TRACK in Ableton Live and you have to set the “MIDI To” of this track to the MIDI port (=MIDI TO USB cable / external sound card) you are using here.
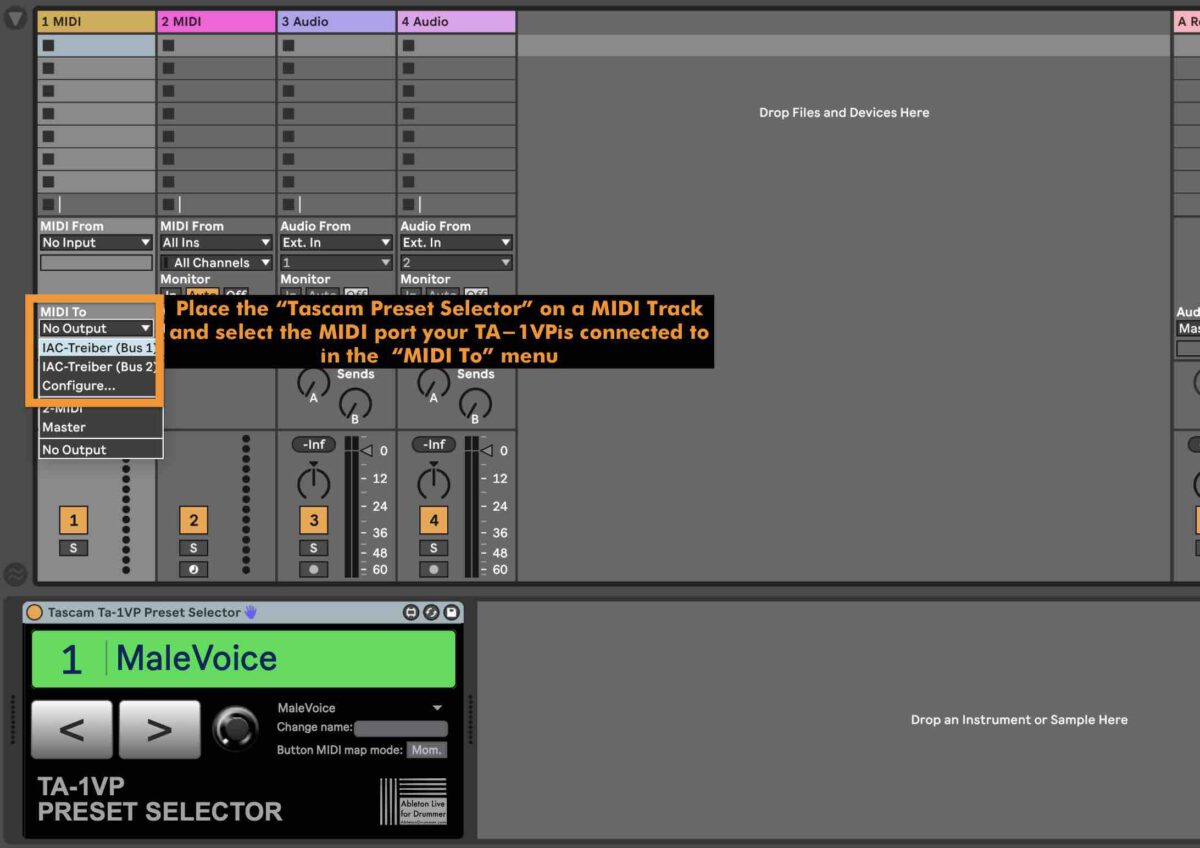
You are now able to send MIDI CC and Program Changes via automations from clips via this track in Ableton Live.
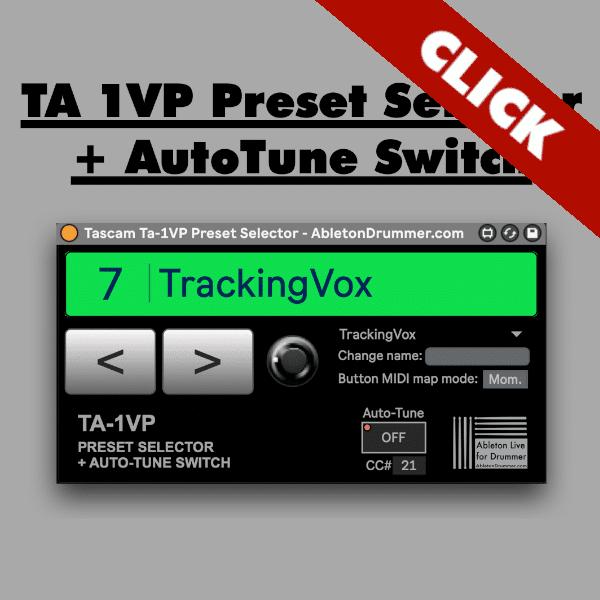
Preset Selector and Auto-Tune Switch Max for Live device
If you have Max for Live you can use the plug-in I made for automating and accessing presets and the Auto-Tune function via Ableton Live. This device is available here for a donation of your choice. Please feel free to ‘buy me a pizza’ if the device is useful for you.
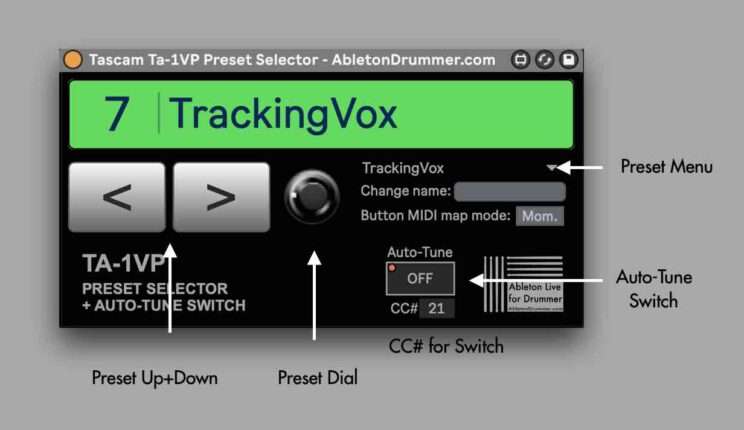
Just place the Max for Live device on the MIDI track which is sending MIDI to the TA-1VP.
You are able to select the presets via buttons down+up or via a menu. This menu will display all names of the presets. To change the name of a preset you can use “Change Name” text input field. The preset selection can be changed via automations and envelopes for this menu. You can see each preset name via the automation break points.
The “Auto-Tune” function can be switched On + Off. The same MIDI CC number is applied in the Max for Live device as it is on the TA 1 VP.
How to set up automated changes from Ableton Live
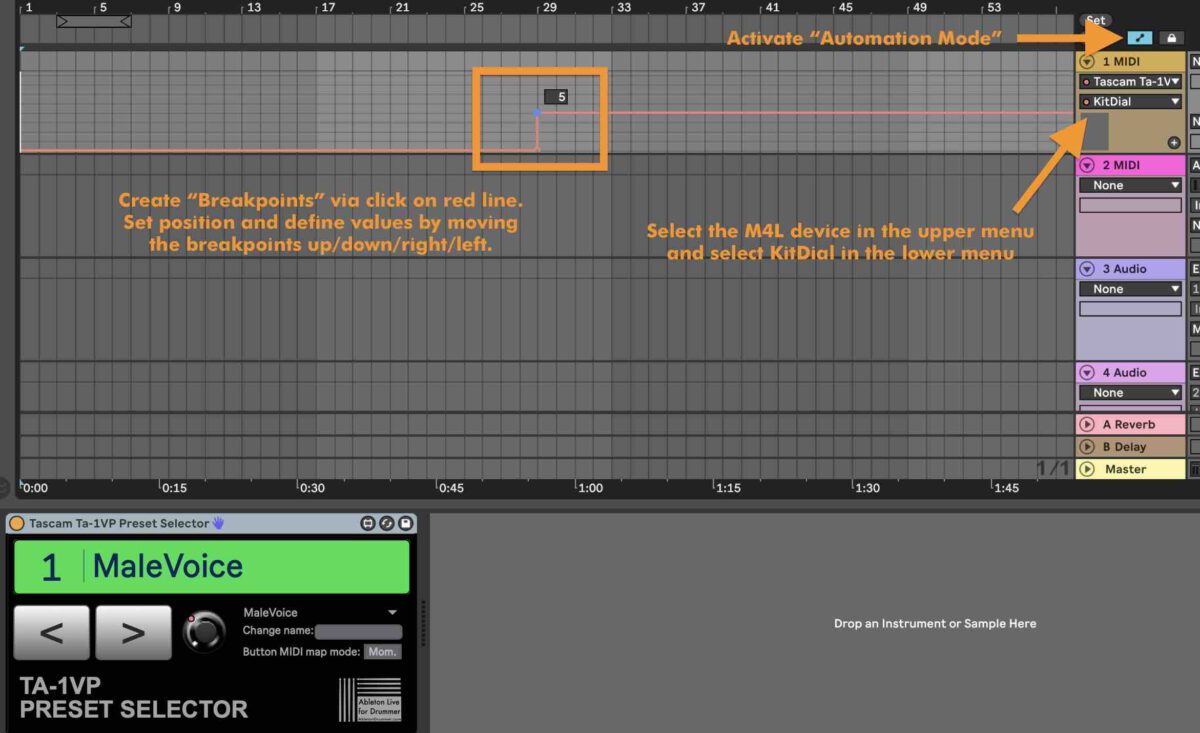
You are able to program automated preset changes. In Ableton Live’s Arrangement you will need to activate “Automation Mode” on the top right. You are now able to select all automatable parameters on each track via the menu on the right of each track. The right view can be selected for each parameter via mouse click on it.
I would suggest to automate preset changes via the “KitDial”.
You are now able to set break points on the red automation lane via mouse click. Please move those breakpoints right and left to your desired position. You can change the value of the break points via moving them up and down.
You can as well right-click on a break point and select “Edit Value”. This way you are able to edit the values for kit changes.
