
Need to control Erae Touch 2 via Ableton and switch layouts or projects seamlessly during performances? The Erae Touch 2 Layout + Project Selector device provides automated control over your Erae Touch 2’s layouts (presets) and internal looper projects directly from Ableton Live. This integration lets you automate layout changes, map MIDI controllers to preset switching, and synchronize your Erae Touch 2 with your Live set without touching the hardware.

What You Need to Control Erae Touch 2 via Ableton
Before you control Erae Touch 2 via Ableton with automated preset and project selection, gather these requirements:
- Ableton Live 10, 11, or 12
- Max for Live (included in Live Suite or available as an add-on for Live Standard)
- The Erae Touch 2 Layout + Project Selector device from AbletonDrummer.com
- Embodme Erae Touch 2 MIDI controller
The Layout + Project Selector device provides two control functions: layout (preset) selection and project selection. Consequently, you can manage both the controller’s configuration layouts and the internal looper projects where recordings are stored.
Understanding Erae Touch 2 Layouts and Projects
The Erae Touch 2 uses two organizational systems:
Layouts (also called presets): These are the different controller configurations that determine how your Erae Touch 2 responds to touch—different scale layouts, MIDI mappings, or performance setups.
Projects: These are storage locations within the Erae Touch 2’s built-in looper where you record and play back performances. Each project can contain different recorded material.
The Layout + Project Selector device gives you separate controls for switching between layouts and projects, letting you automate both independently or together depending on your performance needs.
Set Up MIDI Routing for Erae Touch 2 Control
First, configure Ableton’s MIDI preferences to establish communication with your Erae Touch 2. Open Preferences, navigate to Link/Tempo/MIDI, and locate the Erae Touch 2 in the MIDI Ports section. Activate the “Track” output for your Erae Touch 2 MIDI port. This enables Ableton to send MIDI messages to the Erae Touch 2 controller.

Next, create a dedicated MIDI track for the control device—this track serves only to send control messages, not audio or musical MIDI.
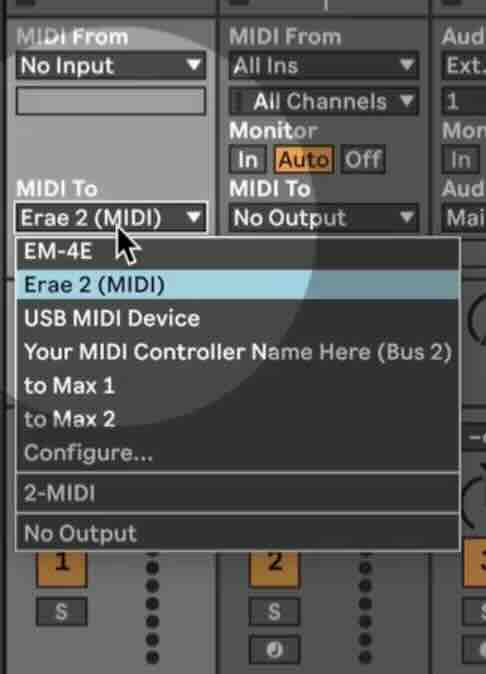
Load the Erae Touch 2 Layout + Project Selector device onto this MIDI track. Then set the track’s MIDI output to “Erae Touch 2” so the device’s messages route directly to your controller. Now the device can send layout and project change commands seamlessly.
Control Erae Touch 2 via Ableton with Layout Selection
The Layout Selector portion of the device provides a dropdown menu showing all available layouts on your Erae Touch 2. Click any layout name, and the device immediately sends the appropriate MIDI command to switch your controller to that layout.
This manual control proves useful during soundcheck or when experimenting with different layouts. However, the real power emerges when you automate layout changes or map them to external controllers.
MIDI Mapping: Enter MIDI Map Mode (Cmd/Ctrl + M) and click the layout selector dropdown. Move any dial, fader, or button on a MIDI controller to assign it. Now you can switch layouts from your external controller without clicking the computer.
Key Mapping: Enter Key Map Mode (Cmd/Ctrl + K) and assign computer keyboard keys to the layout selector. This provides quick layout switching during production sessions when you’re not using external controllers.
Automate Layout and Project Changes for the Erae Touch 2
The most powerful way to control Erae Touch 2 via Ableton involves automation. You can program layout and project changes to happen automatically at specific points in your performance or arrangement.
Create a MIDI clip on the track containing the Layout + Project Selector device. Open the clip’s envelope editor and select the device’s layout selector parameter from the device list. Now draw automation that switches between different layout numbers throughout your clip.
When you play the clip, the Erae Touch 2 automatically switches layouts at the exact moments you programmed. For example, start with a scale layout for melodic playing, automatically switch to a drum pad layout for percussion, then return to a chord layout for harmonic sections—all without manual intervention.
The same automation approach works for project selection, letting you switch between different looper recordings automatically as your set progresses.
Practical Applications for Erae Touch 2 Control
The ability to control Erae Touch 2 via Ableton Live opens several performance and production workflows:
Song Structure Integration: Map different Erae Touch 2 layouts to different song sections. Your controller automatically adapts its configuration for verses, choruses, bridges, and outros.
Looper Project Management: Switch between multiple looper projects during performances without stopping to manually navigate the Erae Touch 2’s interface. Moreover, you can automate project changes to align with specific moments in your set.
Multi-Song Sets: Program each song to automatically load its dedicated Erae Touch 2 layout and project when you trigger that song’s scene in Ableton Live.
Teaching and Demonstration: Quickly switch between different layout configurations to demonstrate various playing techniques or controller setups to students.
Production Experimentation: Try different scale layouts or MIDI mappings on the Erae Touch 2 while keeping your hands on the controller rather than navigating menus.
Combine Manual and Automated Control
You can control Erae Touch 2 via Ableton using multiple methods simultaneously. Set up automation for your standard performance flow, but also map manual controls for spontaneous layout changes when improvising.
For instance, automate your main song structure to switch layouts appropriately, while keeping a MIDI controller mapped to the layout selector for instant overrides when inspiration strikes. This combination provides structured consistency with creative flexibility.
Additionally, the Layout + Project Selector device responds instantly whether you click manually, trigger via MIDI controller, use keyboard shortcuts, or let automation run. All control methods work together seamlessly.


