
Managing your guitar or synth presets can be fast and intuitive when you use Nano Cortex Preset Control via Ableton Live. This Max for Live tool allows you to switch, automate, and perform with your Nano Cortex without tedious menu diving. In this guide, you’ll learn how to connect the Nano Cortex, automate preset changes, work in Arrangement View, and even take full control via a MIDI controller.
The Neural DSP Quad Cortex (get yours here!)* has become a go-to for guitarists seeking deep digital amp modeling, and the Quad Cortex Automator has made controlling it from Ableton Live effortless. Now, its compact counterpart, the Nano Cortex*, gets the same streamlined workflow with the Nano Cortex Preset Control device. This Max for Live tool brings the same preset automation power to a smaller, pedalboard-friendly package — perfect for players who want Quad-level integration without the full-sized hardware.

How to connect the Nano Cortex with Ableton Live
Start by connecting your Nano Cortex to your computer with a USB cable. In Ableton Live’s Preferences > Link/MIDI, enable the Nano Cortex Output Track port. This step ensures you can send MIDI directly to your device.
Next, create a dedicated MIDI track. Set its MIDI To output to your Nano Cortex. Now drag the Nano Cortex Preset Control device onto that track. This device displays all your presets in a list, which you can rename for quick recognition. It also provides a Preset knob for direct selection and control.

From here, you can instantly choose any preset right from your Ableton session, eliminating the need to scroll through options on the Nano Cortex hardware itself.
How to automate preset selection
Automation becomes straightforward with Nano Cortex Preset Control. To automate within a MIDI clip, open the Envelope View and select the device’s Preset knob from the automation chooser.
Add breakpoints to the envelope to select specific presets at precise moments. If you want the preset to change instantly, create two close-together breakpoints — one before and one after the change. This technique prevents the preset knob from sweeping through unwanted values.
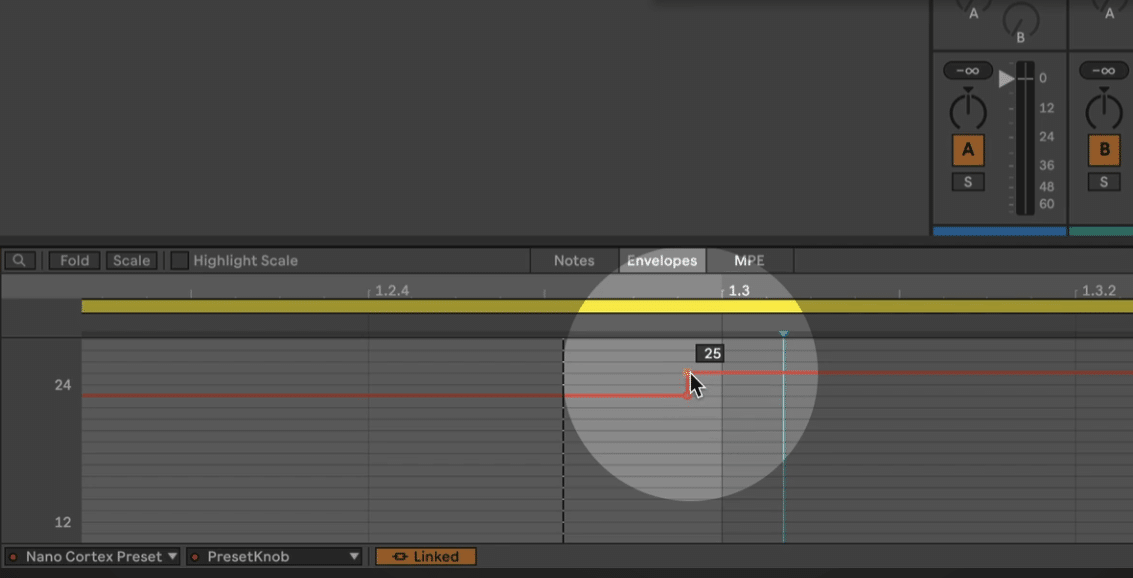
While playing the clip, Ableton sends the preset change to the Nano Cortex in real time. To ensure the new sound is ready exactly when needed, place the automation slightly ahead of the musical moment.
How to use the Nano Cortex in Arrangement View
Arrangement View offers even more flexibility for Nano Cortex Preset Control via Ableton. In this view, selecting a timeline position can trigger a preset change instantly — even when the transport is stopped.
This feature is invaluable for live shows and rehearsals. For example, before starting a song, jump to the exact position where your preset automation lives. The Nano Cortex will switch to the correct preset instantly, so you’re ready to play as soon as the track starts.
How to control your Nano Cortex via a MIDI controller
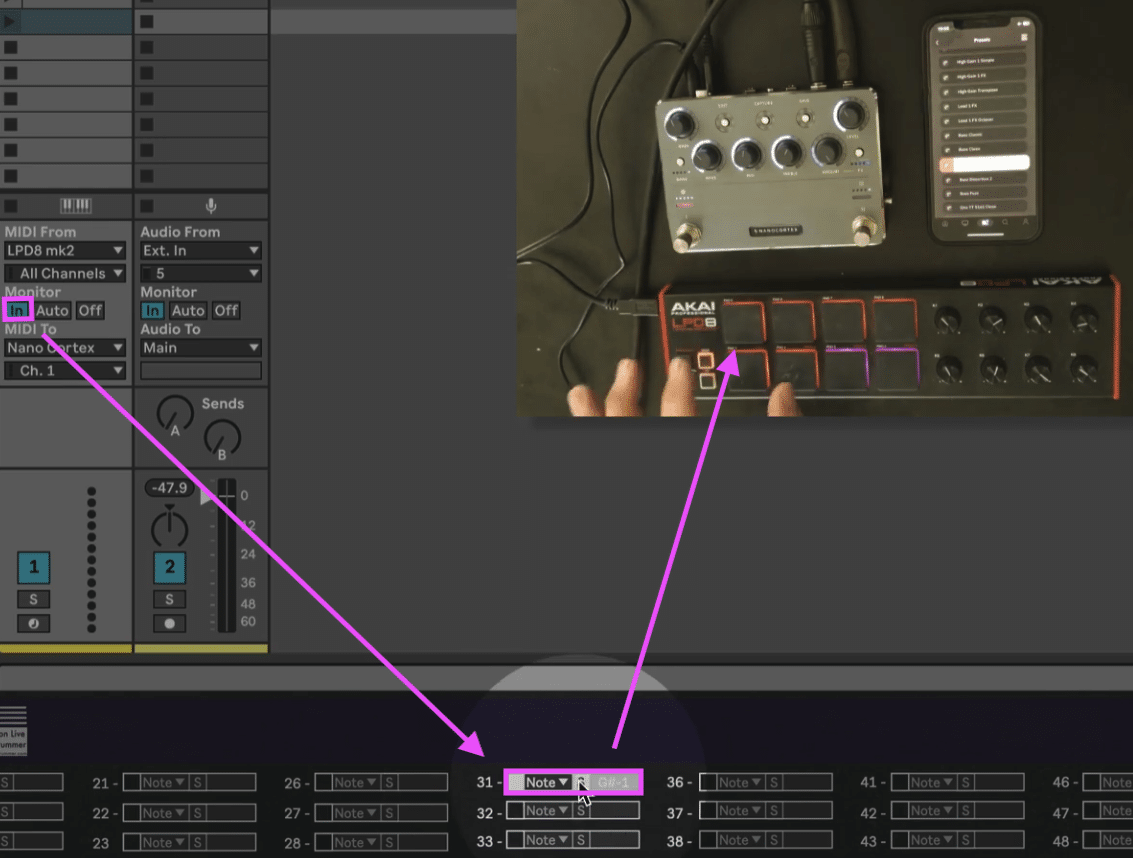
For hands-on performance control, Nano Cortex Preset Control includes a second device that maps incoming MIDI messages to preset recalls.
Set your MIDI track’s Monitor mode to In and send MIDI from your foot controller, pad controller, or keyboard. You can map buttons, pads, or keys to individual presets. The device accepts MIDI notes, CCs, and Program Change messages, meaning popular foot controllers like the Behringer FCB1010 * integrate seamlessly.
With this setup, you can instantly recall any preset without touching your computer or scrolling on the Nano Cortex itself.
Make sure to also check out the full video tutorial and the quick preset automation video below.
*affiliate links


