When using Ableton Live’s Arrangement View for playing live shows you want the transport to do an automatic stop and jump to next locator. This way you don’t need to hit or press stop and navigate to the next song. Just use my “Stop after Song and Go to Next Locator” Max for Live device to take care of that. The right song would be ‘cue’d up’ and you could just fire the next song when you are ready. It is easy to set up, you just need to set up a locator for all song starts cue points and a few MIDI clips.

How to set-up an automatic stop and jump to next locator
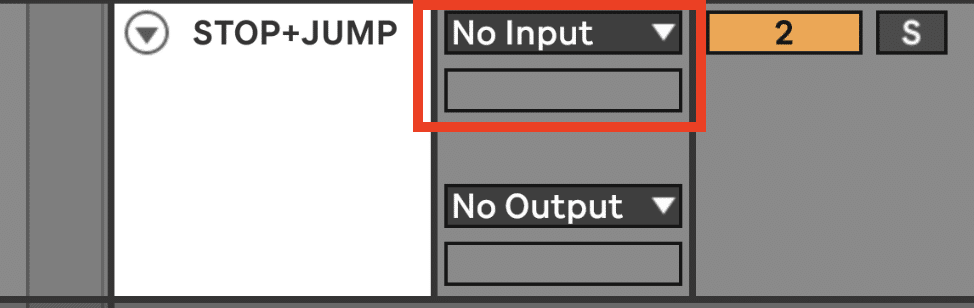
Create MIDI Track in Ableton Live
Just place the Max for Live device on an empty MIDI track. Make sure to set the “MIDI From” to “None”. You can create a MIDI track via the short cut “CMND+Shift+T” (Mac) or CNTRL+Shift+T”. Please make sure your MIDI input is set to “No Input”, so no MIDI controller can interfere.
Set Up Song Start Locators and markers in Ableton Live
Each song start cue point needs to have a locator. The “Jump to Next Locator” action jumps FROM the current play time in Ableton Live to the next locator.

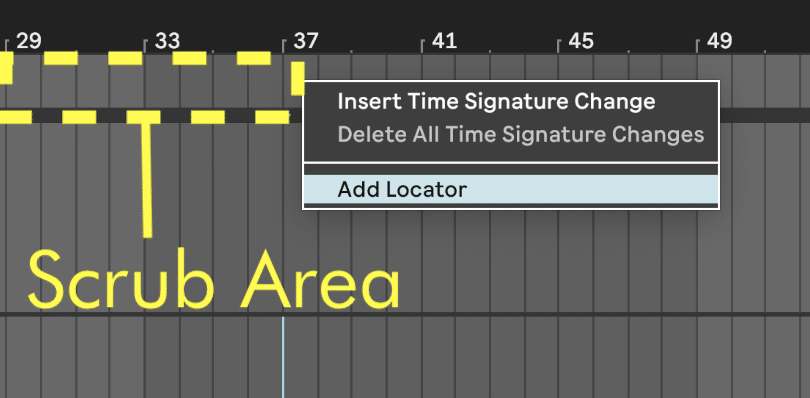
How to create a marker in Ableton Arrangement View
Markers in Ableton’s Arrangement are called “Locators”. You can create locators in Arrangement View via right-click + “Create Locator”. The mouse needs to be in Ableton’s Scrub Area. The Scrub Area is above the topmost track and below the bar count numbers in Ableton’s Arrangement.
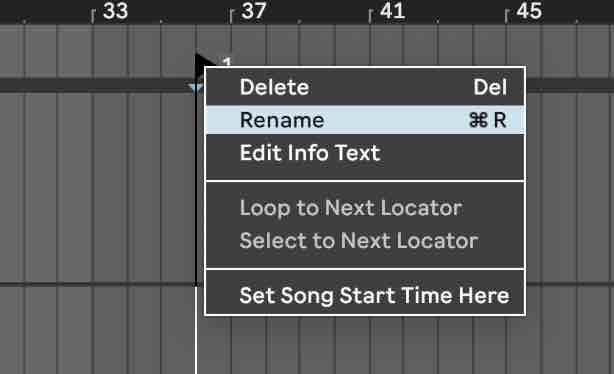
How to re-name locators and markers in Ableton Live
You can re-name locators via right-click and selecting “Rename”. You can as well select a marker/locator and use the key command “CMN+R” (Mac) / “CNTRL + R” (Windows).
Set up automatic stop and jump to next locator in Ableton
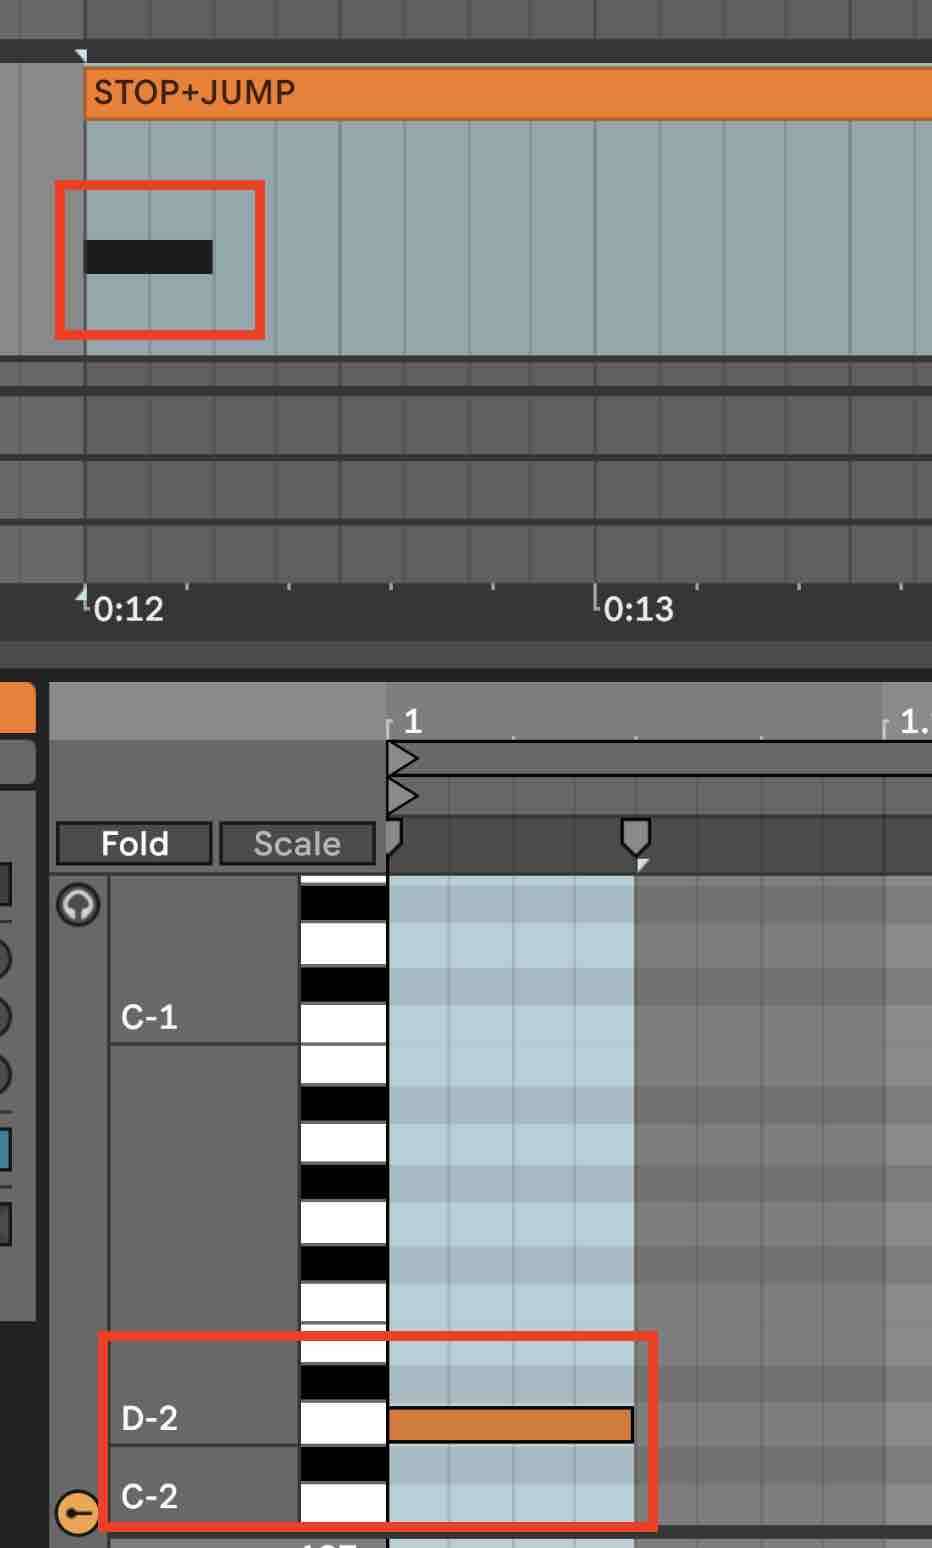
You have to create MIDI clips on this track with certain MIDI note pitches. Those MIDI notes will trigger certain actions:
- “C-2” (“C minus 2”) – the lowest note pitch there is in MIDI. This note will trigger the transport in Ableton Live to STOP
- “C#-2” – will trigger a JUMP to the NEXT LOCATOR
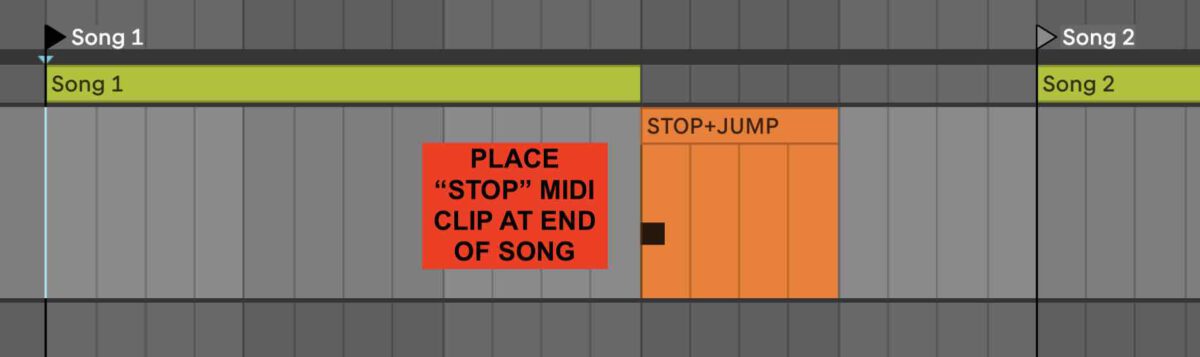
- “D-2” – will trigger both of those actions
Set Automatic Transport Stop in Ableton Live Arrangement via clips
Just set up the MIDI clip(s) with the dedicated notes for the actions you need. You could give the locators a colour coding and name them accordingly.
You now just have to place the MIDI clips on the time points in Ableton’s Arrangement View where the actions should be triggered.