

“How can I change my (drum) samples and sounds which I trigger in a Drum Rack when switching to a different song in Ableton Live? ” As I’m getting this question on a quite regular basis, I decided to write this blog post/manual. Ableton Live has a great concept for having multiple presets for Instruments, Audio Effects and MIDI Effects on one (MIDI) track. “CHAINS” + “CHAIN SELECTOR” is the name for this concept in Ableton Live.
CHAIN SELECTOR + RACKS in Ableton Live
As just written the “chain-concept” is applicable for all Ableton Lives devices and even for VSTs and other plug-ins. You can have a big number of chains and they can include not only one device but a whole collection of multiple devices. “RACKS” have chains nested inside. Depending on what kind of devices (instruments, MIDI or audio) you want to stack here. Those RACKS will be “MIDI Effect Racks”, “Audio Effect Racks” or “Instrument Racks”.
For the example of changing drum samples nested in Drum Racks we will need to create an Instrument Rack.
Create an Instrument Rack
There are two ways to create an Instrument Rack:
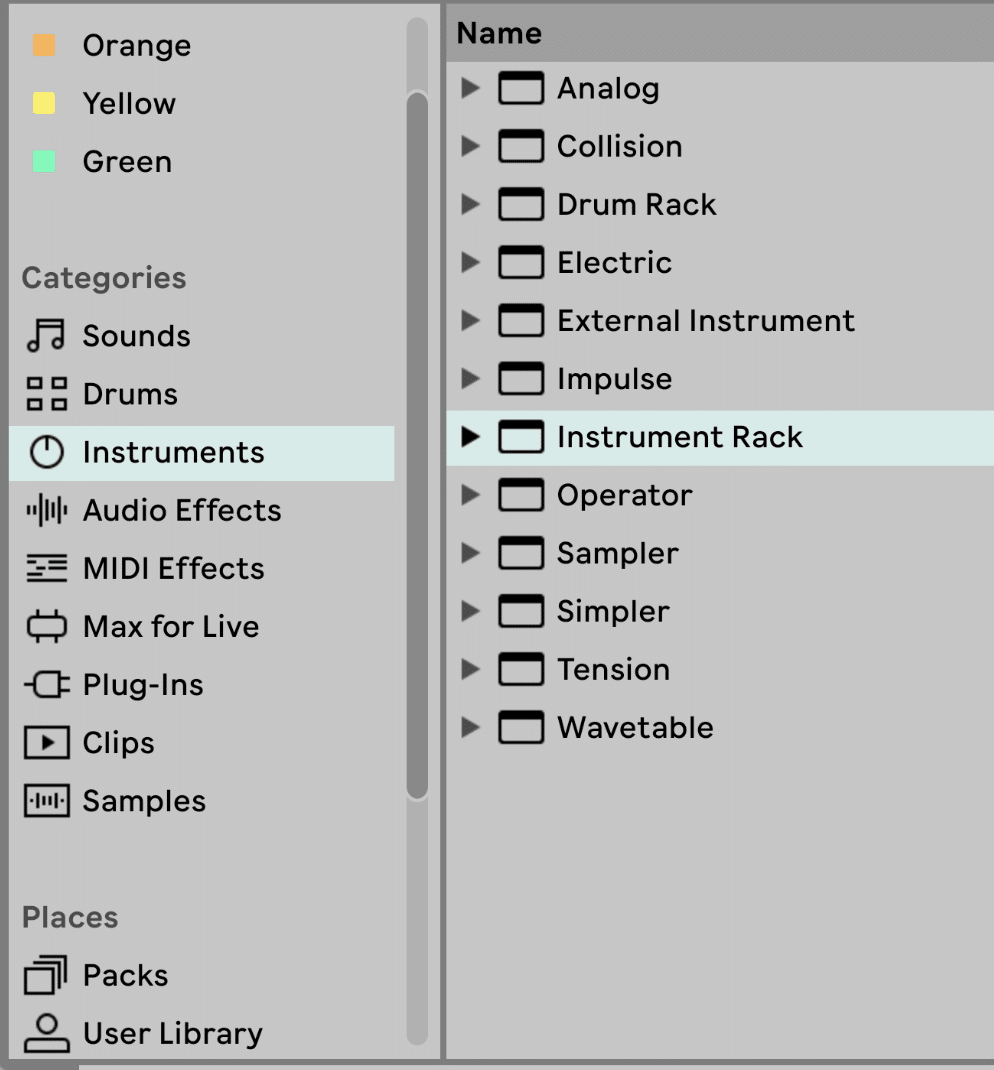
-just select + ‘drag and drop’ an empty Instrument Rack from Ableton Lives device browser. (“Instruments” -> “Instrument Rack”)
-you can GROUP an existing Drum Rack sitting on a MIDI track:
Just right-click on the top bar of the Drum Rack and select “GROUP” (or use the short-cut CMND+G)
Adding more Drum Racks and Chains
Once you have an Instrument Rack you can now add more Drum Racks (or other Instruments) into new chains. For this you need to open the “Chain View” on the far left of the Instrument Rack. Then you can drag and drop more Drum Racks in the empty area under the other already existing chains.
Selecting the Drum Rack and setting up CHAIN SELECTIONS
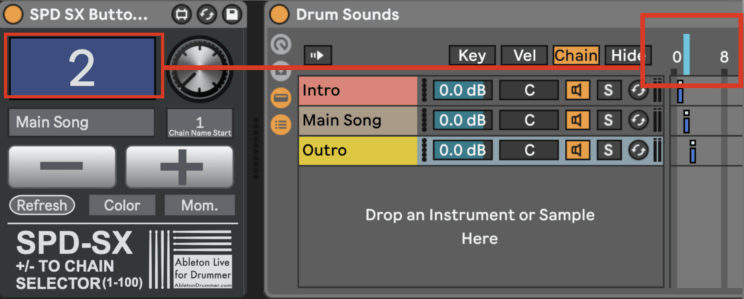
Up to this point all CHAINS = all Drum Racks will now receive the incoming MIDI and will trigger the sounds and samples. We now want to set the CHAIN SELECTOR parameter in Ableton Live and apply each CHAIN to a certain range.
To do this we need to open the CHAIN SELECTOR EDITOR and to edit each chain to a value.
We are now already able to select the different chains (=Drum Racks) via the CHAIN SELECTOR, the orange line aboove all chains. Only the chains which are set to the number which will match with the chain selector selection will receive the MIDI.

Making the selection more access-able and user-friendly via the CHAIN SELECTOR
You are now already able to select the different Drum Racks via the chain selector by mouse. You can MIDI map the chain selector to some external MIDI controller via that as well. Set-up automations via MIDI Dummy clips here already. But to make this more user-friendly (and for some later on here explained CPU friendly usage) we will use some MACRO-CONTROL set up here.
You can MACRO-MAP every parameter of RACKed Instruments/Drum Racks to the macros control knobs. For this you need to open the MACRO CONROL VIEW. A “MAP” button now shows up and when activated you can map parameters to the macros. You can now select the CHAIN SELECTOR AREA by click and then click on the MAP field under one macro wheel.
The first macro knob here is now controlling the chain selection.
Automating Drum Sound Changes via the Chain Selector
You can now select different drum sounds by mouse (or an external MIDI controller if you MIDI map this to the macro wheel). But when playing live you want those sounds and chains to be selected automatic e.g. when switching to another song.
You can do this via using MIDI DUMMY CLIPS sitting on this track. Just create a new MIDI CLIP in Session View (or in arrangement view).
Open up the ENVELOPE BOX and navigate to the “Chain Selector” parameter. You can now set a red dot here on the line and pick the number value you want to be triggered by this clip. Make sure you UN-LOOP this clip.
When this clip is triggered, the chain selector is jumping to the value. It will select the Drum Rack which is sitting in this chain.
This way you can set up a dummy clip + automatic change for every Drum Rack and chain.
Saving CPU (and RAM) usage in Ableton Live
Of course having one track with multiple instruments and Drum Racks is using more of your computers CPU and RAM. You can save a bit of that usage here if you automate the activation of the instruments sitting in your tracks. This technique uses the Macro Control function of Ableton Live here as well.
You will have to MAP every ON/OFF switch of every Drum Rack. You can make a Drum Rack to be switched to ON when its chain is selected. Change the values for the “MIN” and “MAX” for this macro mapping.
Set this up like this:
1st – MACRO MAP the ON/OFF button of your DRUM RACK to the same MACRO CONTROL knob (“Chain Selector”)
2nd – Change the MIN + MAX value in the Ableton Lives Mapping Browser for this mapping to the same value you picked for this chain in the chain selector.

Now only when the chain selector macro is selecting the right value the Drum Rack(s) will be switched to ON.