
The Live Chopper Max for Live Device is a fast and easy way to re-sample any audio in Ableton Live. You are able to record and re-trigger live audio signal e.g. your voice via a mic.You can then trigger those samples on the fly right away. The device works with any kind of MIDI controller which can send MIDI notes including the Ableton Push 1-3, MPD, electronic drum pads, or even your computer keyboard.

Please watch the video below to see how HAWT CHOCO is using the “Live Chopper” for his performance with Ableton PUSH.
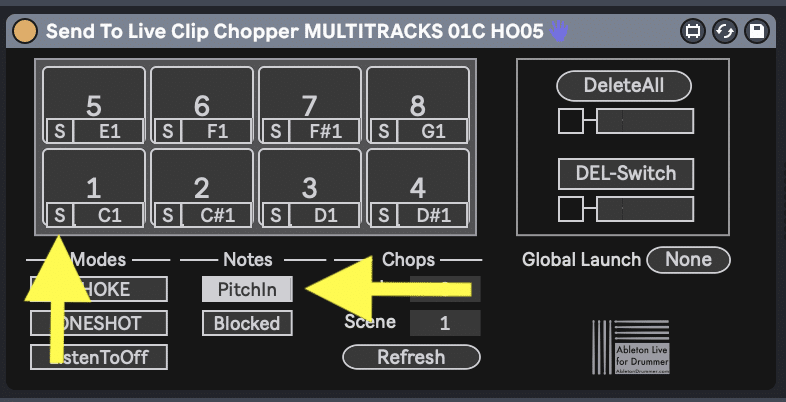
Set up MIDI note pitches for record and re-trigger in Ableton
With “PitchIn” mode you can assign any MIDI note you’d like to the Live Chopper pads. Simply press the “S” button on a Live Chopper pad and then press a button on your MIDI device. This will assign that MIDI button to the pad in the Live Chopper.
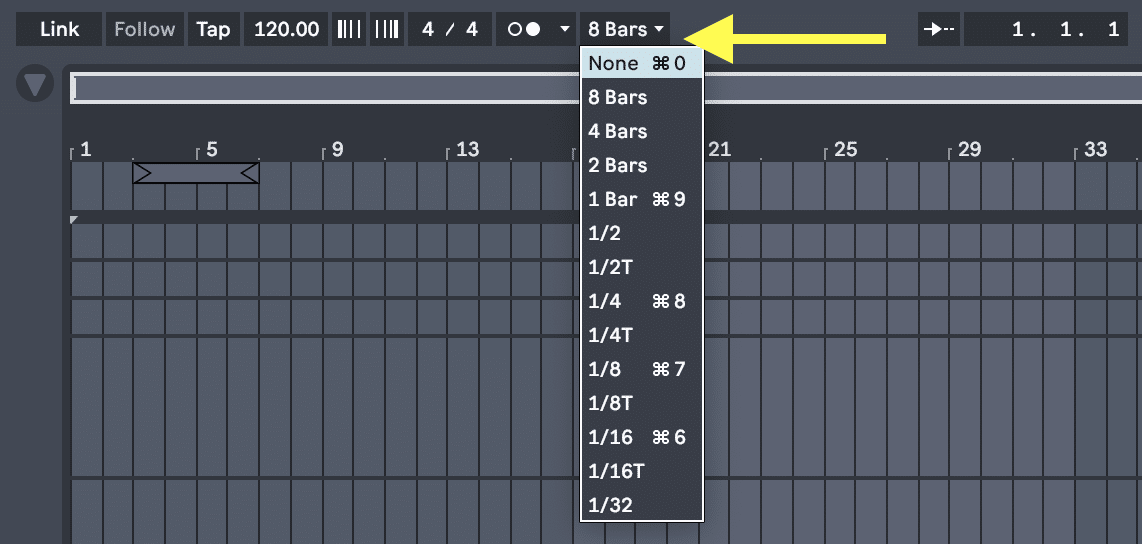
Ableton Preferences Setup for Global Launch Time
You’ll need to change your “Global Launch” setting to “None”. This will allow the Live Chopper to begin playing your sample exactly when you press a pad— otherwise the sample will only play according to the Global Launch setting you have chosen. You can find your “Global Launch” settings in the drop down menu on the top left of the screen.
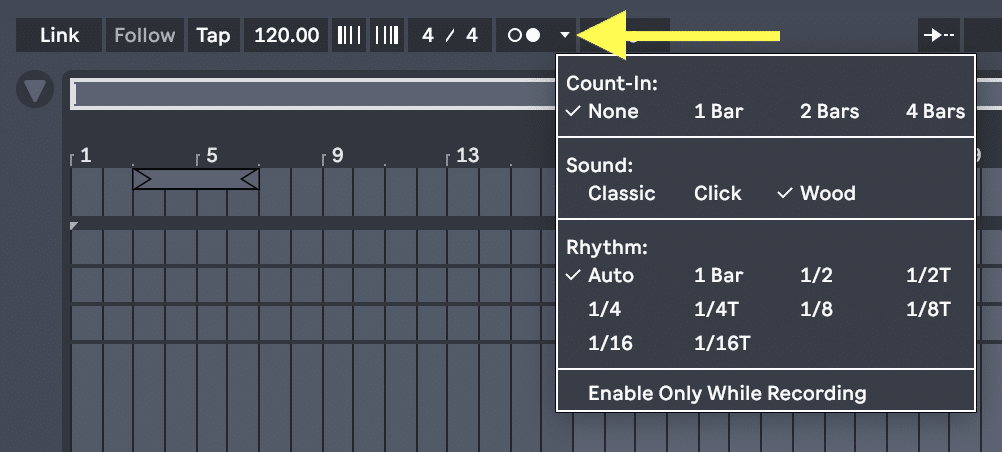
You’ll also need to make sure to select “None” for the “Count In”. This will allow the Live Chopper to begin recording your sample exactly when you press a pad— otherwise the recording will only start according to the “Count In” setting you have chosen. This way you can record and re-trigger clips in Ableton Live instantly. You can find your “Count In” settings in the drop down menu next to your metronome on the top left of the screen.
If your “Count In” or your “Global Launch” settings are set to anything other than “None” then the Live Chopper will present you with an error message. For your convenience you can easily change your “Global Launch” setting to “None” by clicking the “None” button presented by the error message.

How to set up Audio Routing and Ins & Outs in Ableton Live
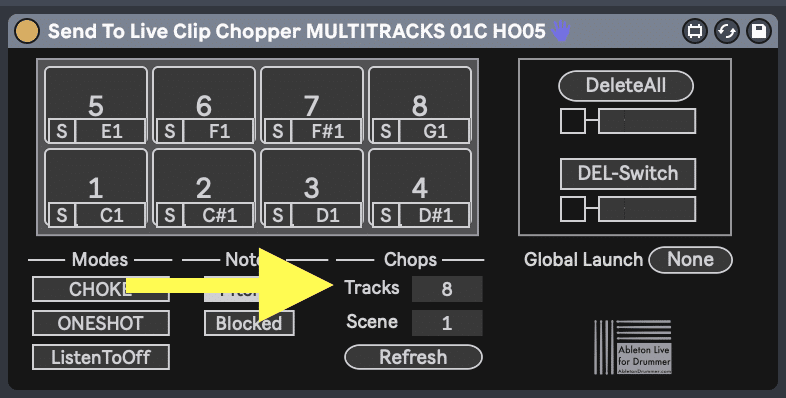
The Live Chopper must be placed on a MIDI track within ableton. In the example below this is the track labeled “MIDI – Live Chopper”. This is the track that holds the Live Chopper Device. The Live Chopper then records its samples into clips on the Audio tracks that are placed directly to the right of the MIDI track.
You can add up to 8 Audio tracks after the Live Chopper MIDI track. Each Audio track will correspond to a pad in the Live Chopper. You can choose the number of Chops you would like to use in the “Chops” menu.
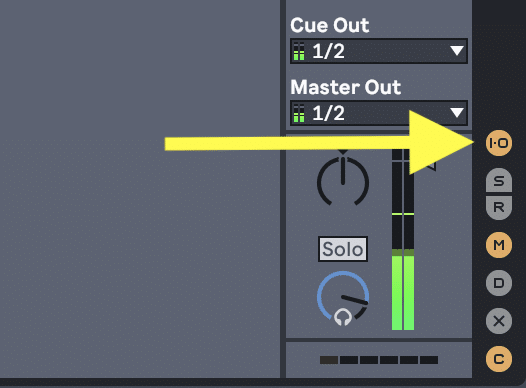
Open your Ins & Outs menu by pressing the I-O button on the bottom right of the screen.
Make sure each Audio track is receiving “Audio From” the input channel of your microphone. In the example below this is channel 1.
Notice the Monitor buttons for the Live Chopper MIDI track and the following Audio tracks are set to “Off”. Instead, you may like to have a separate dedicated Audio track for microphone monitoring. In the example below we are monitoring with the “audio – Mic Monitor” track which has Monitor set to “In”.

If you make any changes to the track order or the audio routing make sure to press the “Refresh” button afterward. This will ensure the Live Chopper Device is using the most current routing.

How to change the Play Modes for record and re-trigger in Ableton with the Live Chopper
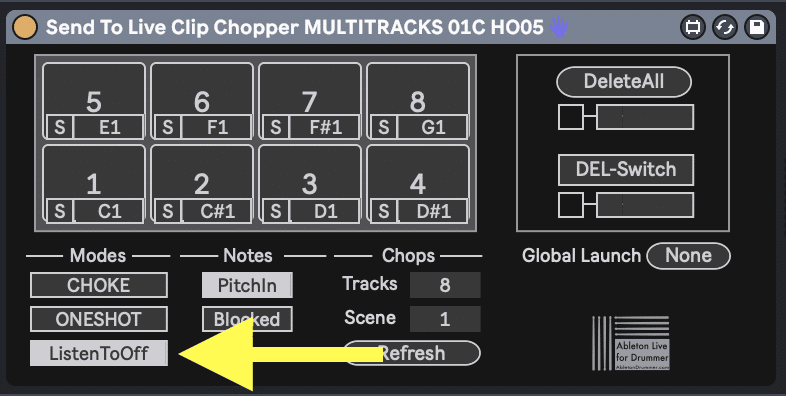
Play modes affect how the pads respond while you are playing your recorded chops. If you would like the sample to stop playing when you release the pad then activate the “ListenToOff” button. When you would like the entire sample to play even after a quick tap, then make sure the “ListenToOff” button is turned off.
If you would like to loop your recorded sample then activate the “REPEAT” button. Keep in mind, the sample will continue to repeat even after you release the pad unless “ListenToOff” is activated or the sample is choked by another pad.

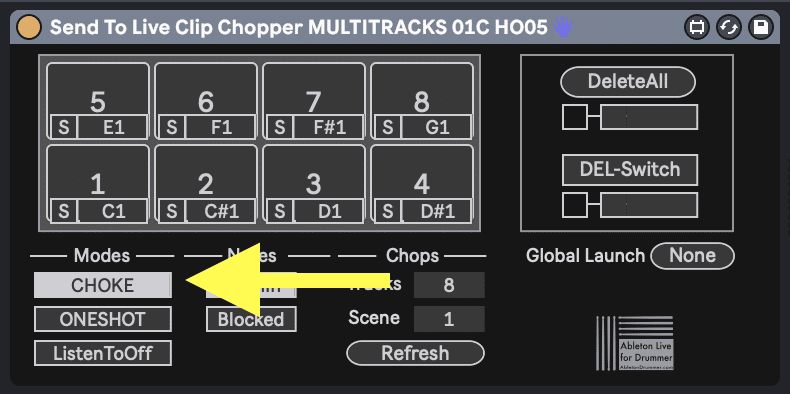
The Live Chopper Device can play up to 8 samples simultaneously. If you would like only one sample to play at a time then you can activate the “CHOKE” button. With this activated every pad will stop playing as soon as another pad is triggered.
How to delete samples in Live Chopper in Ableton
If you would like to delete all of the samples recorded into the Live Chopper Device you can hit the “Delete All” button.
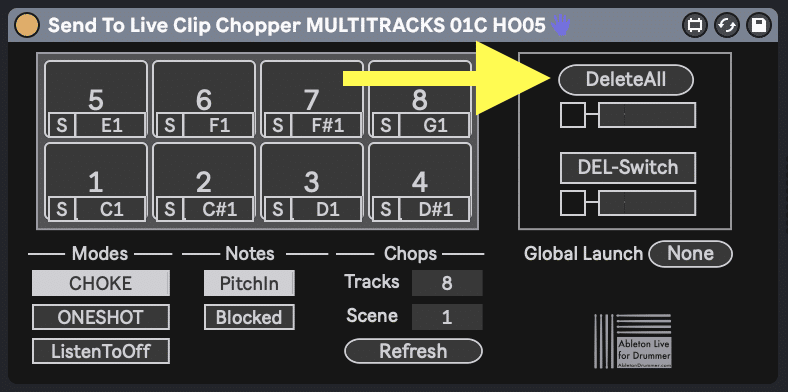
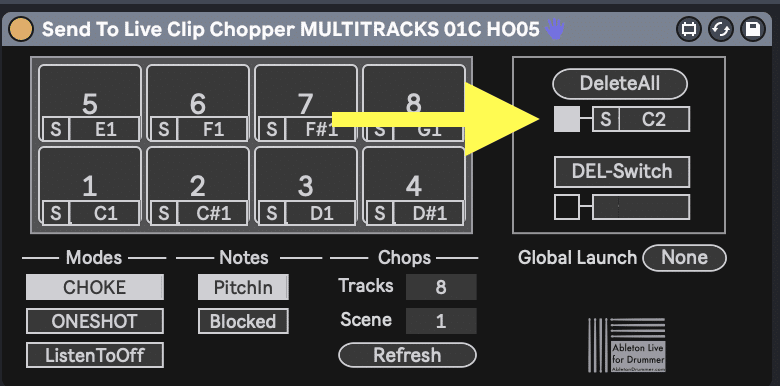
Click the box underneath this button if you want to map a MIDI pad to your “DeleteAll” button. With this box checked you can press the “S” button and then press any MIDI button you would like. This will then become the trigger for your “DeleteAll” button.
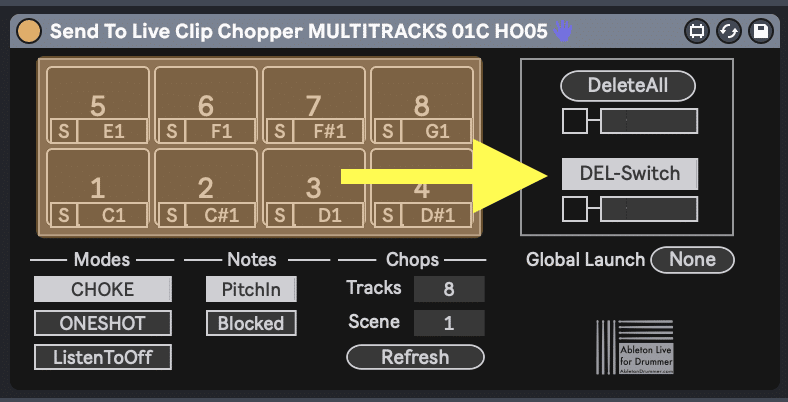
If you only want to delete a single sample then press the “DEL-Switch” button. With that button active simply hit the pad with the sample you want deleted. The Live Chopper pads is highlighted when the “DEL-Switch” button is active.
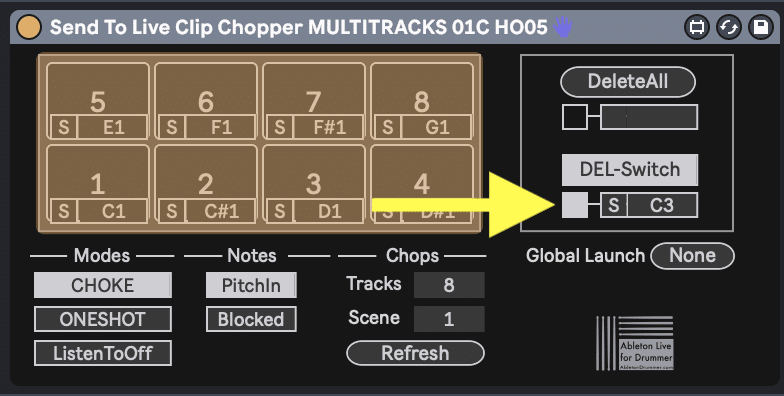
Just like the “DeleteAll” button, you can map another MIDI pad to the “DEL-Switch” button. This will allow you to hold that assigned pad and then hit a Live Chopper pad to delete that individual sample.
How to passthrough Non-Assigned MIDI notes in Ableton Live
Although you can place MIDI instruments on a track after the Live Chopper, the Live Chopper device will block any MIDI notes from going through to any following devices. When this is happening you’ll see a “Blocked” button in the “Notes” menu.
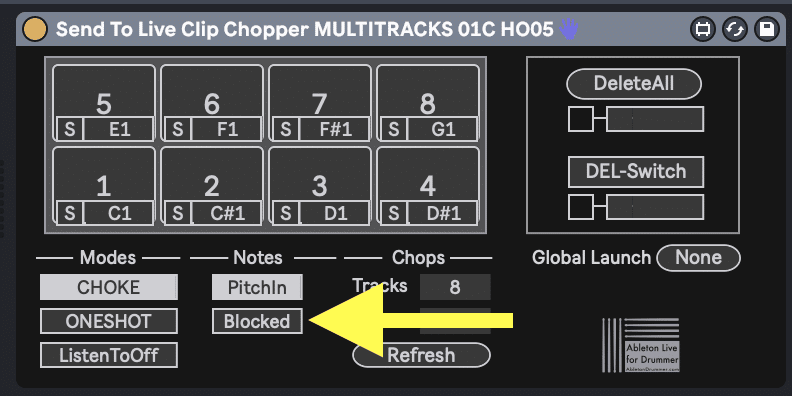
If you would like to send MIDI notes through the Live Chopper Device into any other MIDI devices which follow on that MIDI track then you need to activate the “Through” button in the “Notes” menu. This will allow MIDI notes to pass through the Live Chopper Device to enter any following devices or instruments.

The Live Chopper technique is one creative way to use re-sampling live. You can record yourself via a mic making drum and beat box sounds. You can record the audience or you can hit on objects and record those noises. This technique is definitely something which will add a visual performance aspect to you live show.
Full Video Run-though tutorial on how to record and re-trigger audio samples
You will find a full video manual for the Live Chopper Max for Live plug-in below. Please take the time to watch to fully understand what this Max for Live device is capable of. You will learn and understand every single function for recording and re-triggering live audio chops in Ableton Live.

