
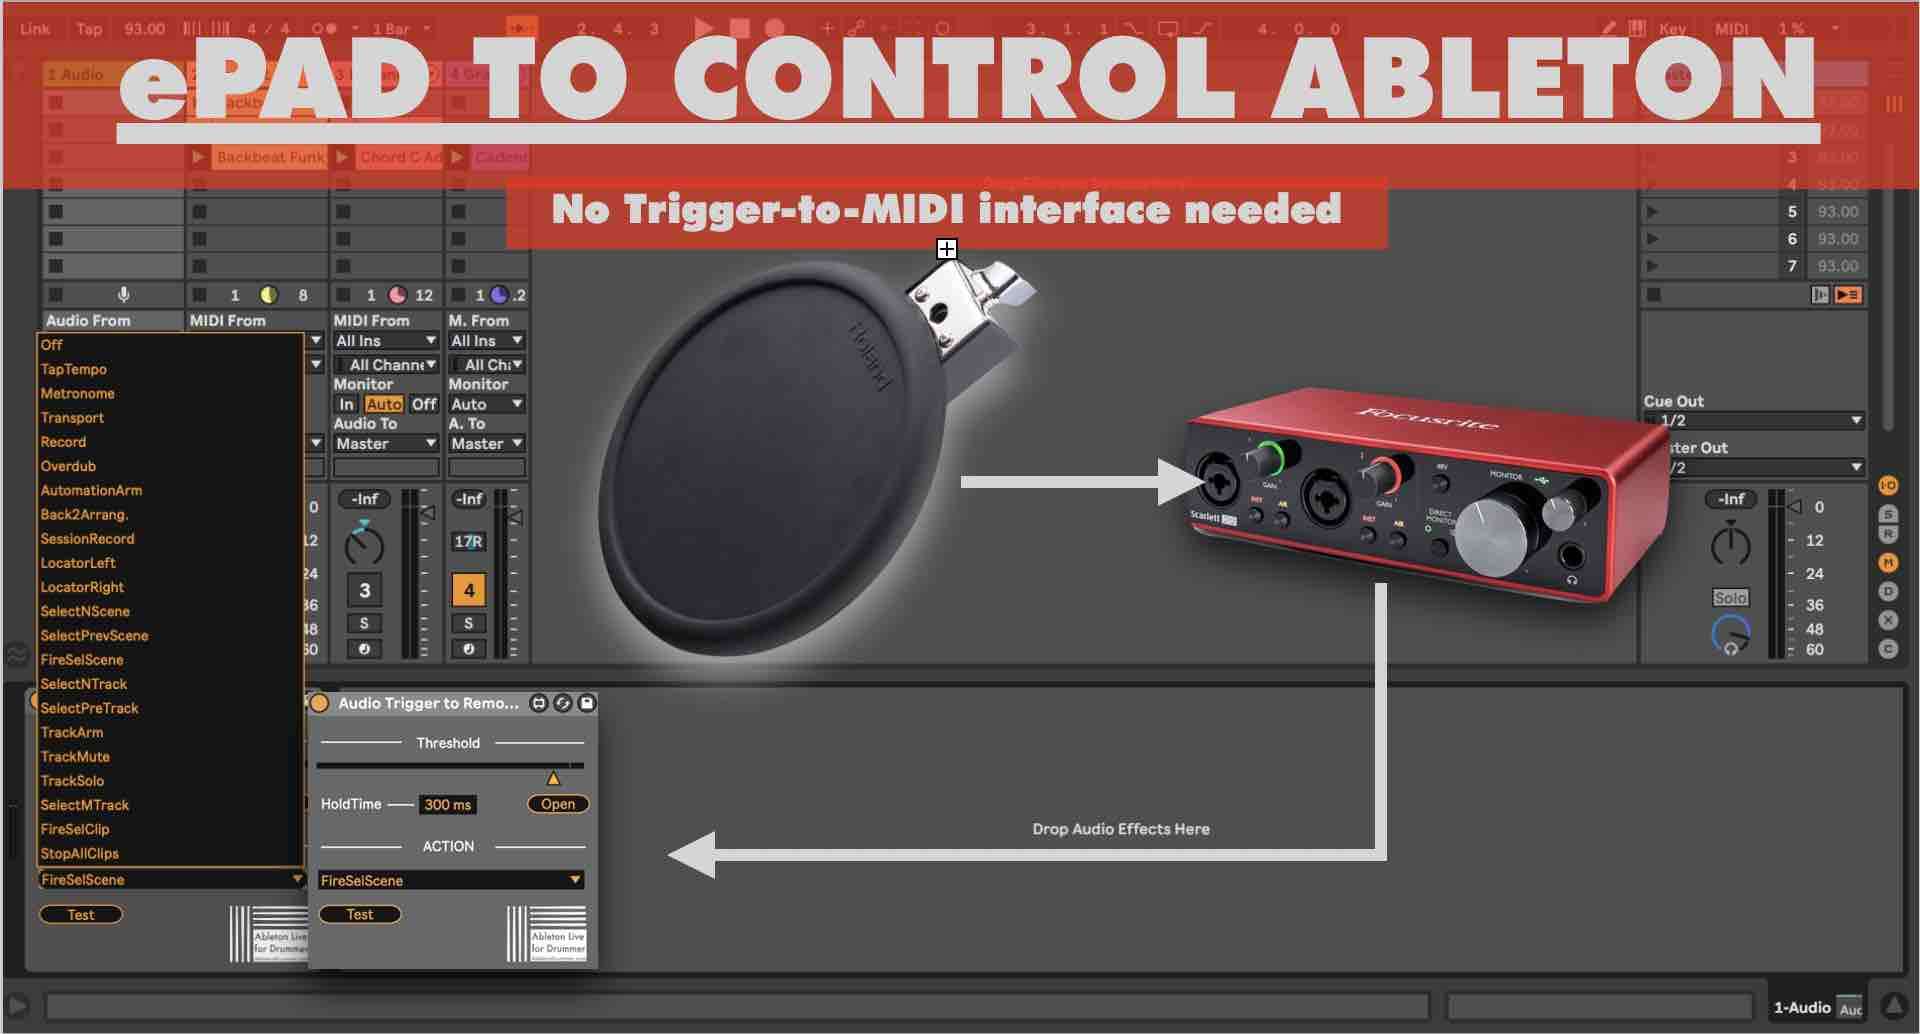
How to control Ableton Live via an electronic drum pad
You don’t want to buy or bring a trigger-to-midi interface when you just need one drum pad to trigger one function in Ableton Live. You might have an old rubber drum pad laying around or wan to get a Roland BT-1 trigger and just set this up to trigger through your scenes in Ableton Live’s Session View. This is now possible via a collection of Max for Live devices of mine. This pack will let you control Ableton with drum pad without the need for any extra gear. IF you have an external sound card, you can plug your pad(s) into that.

What do I need to set up an electronic drum pad to control Ableton Live?
Electronic drum pad or drum trigger
Well first you would need an electronic drum pad obviously. If you are using a stereo trigger or drum pad you might need to split the signals via a Y-jack cable. This way you would be able to trigger two different actions in Ableton Live.
External audio interface / external sound card
You would need an external audio interface with an audio input socket where you can plug in your drum pad or drum trigger with MONO jack cables. You can set up and use several electronic drum pads depending on how many audio in sockets you have available.
Max for Live
Max for Live is an extension of Ableton Live.Max for Live is included in Ableton Live’s SUITE version or can be bought as an add-on for Ableton Live STANDARD.
Set-up in Ableton Live and connections to your sound card
I would advise you to store and install the Max for Live devices in your User Library.
Connect your drum pad into one of your sound card inputs
IMPORTANT! Make sure that you:
-de-activat the phantom power
-set the gain all the way down
-if you have the option to lower the input, please activate this. (“PAD” or similar). Please refer to your sound card manual.
If your INPUT is set to high, this might lead to overdrive your audio input!
This could harm your sound-card!
Set up in Ableton Live
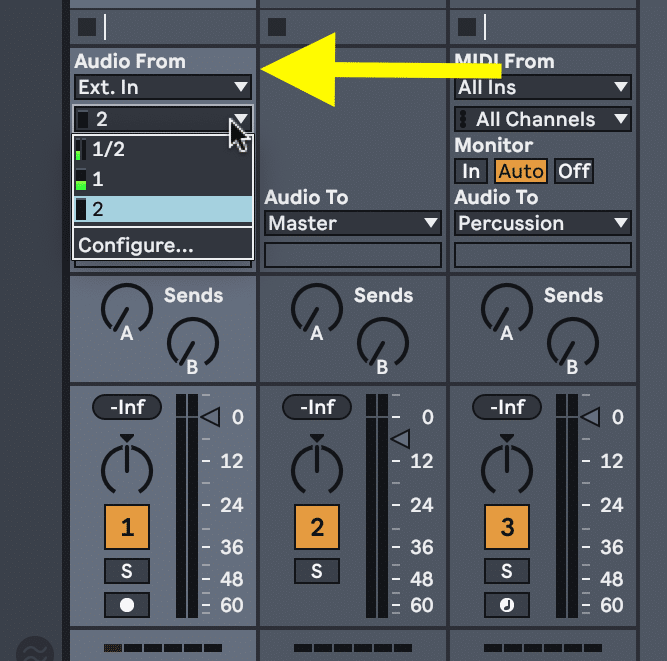
Next, open up an Audio Track and choose the correct input channel from your audio interface. Ableton can now receive an audio signal from the e-pad internal microphone whenever you hit the pad. After you’ve chosen the right audio input channel you should see an audio signal coming in when you hit your pad.
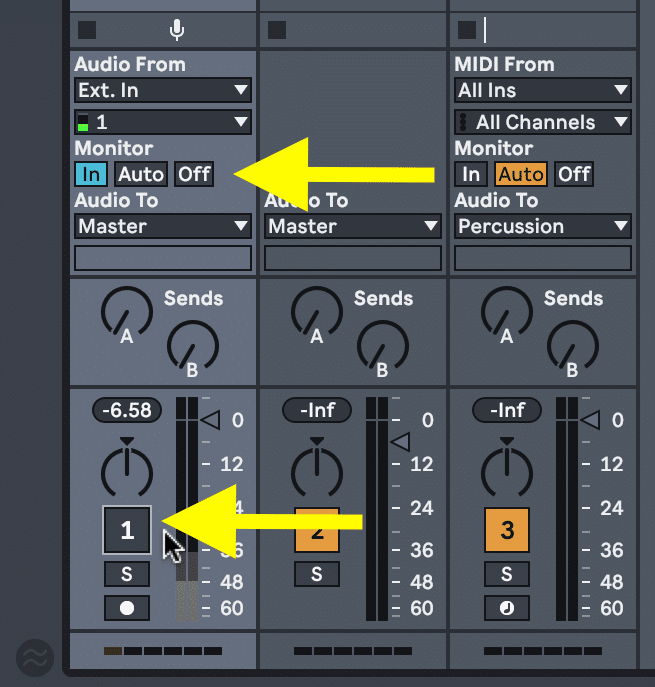
Next, make sure to set your Monitor to “In”. This way the track receives a signal from the electronic pad. Finally, turn your track off. This will make sure we don’t actually hear any audio
Setting up the Max for Live devices
All Max for Live devices of this pack have a Threshold and a Hold Time parameter. If the audio signal passes the “Threshold” the particular action is triggered. After the Threshold has been passed a “Hold Time” will determine a ‘pause’ until the next action can be triggered.
Setting top the Audio Input Threshold

You are now able to Monitor the amplitude of your hits in the device. Please set the threshold here according to your amplitude. You want to set the threshold according your normal hitting strength.
How to use the Hold Time

The Hold Time determines the time between triggered actions. In other words: once you trigger an action the device will wait a pre-defined time before another action trigger is possible. This HoldTime avoids double triggering. If you experience any double triggering, you can set this to a longer time value.
How to Trigger Remote Actions in Ableton Live
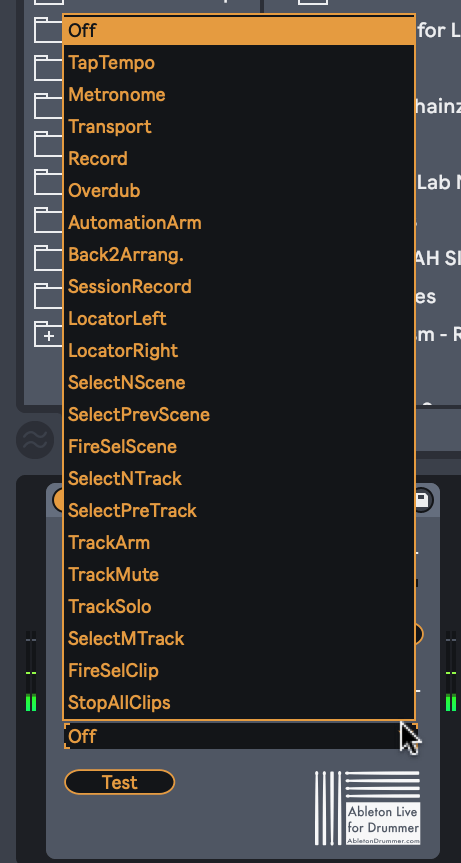
If you would like to control basic functions within Ableton that only require a single action such as record, activating the metronome, track muting, scene activation, etc. then you may benefit from the “Audio Trigger to Remote Action” device.
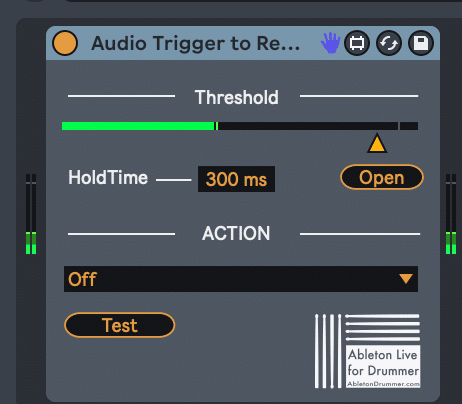
First, drag the device onto your prepared Audio Track. Next, set your “Threshold”. The threshold sets the audio volume required to activate the action. If your threshold is too low a small bump or loud noise may trigger the device. If the threshold is too high then you may need to hit the pad extremely hard to trigger the action. Dial in the right threshold for your playing and set up.
Next, you can set your “Hold Time”. This is the length of time the device will wait before activating another trigger. This helps to prevent unwanted double or triple triggers in quick succession.
After you’ve dialed in your Threshold and Hold Time you can choose which parameter you would like to change when you hit your e-pad. The dropdown menu shows all of your options. After you’ve chosen one you can use the “Test” button to make sure the device is triggering the desired action.
How to toggle between Min + Max values of a mapped parameter
If there is anything you would like to control with your e-pad that isn’t on the dropdown menu for the Remote Action Device then you can use the “Toggle Min+Max” Device to switch between the minimum and maximum values of a parameter. This device can also be used to switch between on/off states of a parameter.
For example, if you would like to toggle an Effects Chain or an Audio Track on and off by hitting a pad then this device is for you!

First, add the device to your prepared Audio Track and dial in your Threshold and Hold Time. Just like the previous device the Threshold sets the audio volume required to trigger the action. And the Hold Time is the length of time the device will wait before triggering the next value.
Next, click the “Map” button and then click on any parameter you would like to toggle with your e-pad. Finally, you can use the test button to check that the device is indeed toggling that parameter.
How to toggle between pre-set values in Ableton Live
The above device only toggles between the minimum and maximum value of a parameter. If you would like to toggle more specific values then you would benefit from the “Toggle Preset Values” Device.
This allows you to choose a specific minimum value and a specific maximum value that is toggled when you hit your e-pad. For example, if you would like to toggle between 12% dry/wet on a reverb device and 84% dry/wet on a reverb device by simply hitting an e-pad then this is the device for you.

Add the device to your prepared audio track and set your Threshold and Hold Time just like the other devices.
Next, click the “Map” button and then click on the parameter you would like to toggle with the electronic pad.
Finally, set your desired minimum and maximum values at the bottom of the device. You can then click the “Test” button to ensure the device is changing the correct parameter.
How to trigger a specific value for an Ableton parameter
If you aren’t interested in toggling between a range of values and you simply want a parameter to go to one specific value everytime you hit your e-pad then the “Pre-Set Value” Device is for you.
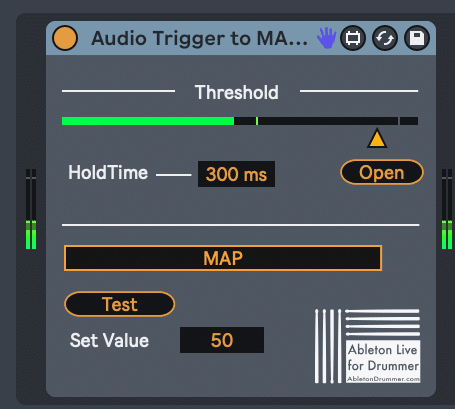
Add the device to your prepared audio track and set your Threshold and Hold Time just like the other devices.
Next, click the “Map” button and then click the parameter you would like to adjust with the e-pad.
Finally, set your desired value at the bottom of the device. You can then click the “Test” button to ensure the device is changing the correct parameter.

