
Macro variations play a significant role in enhancing your workflow in Ableton Live. They simplify complex processes, allowing you to manipulate multiple parameters simultaneously. This guide will provide you with step-by-step instructions on how to automate macro variations in Ableton Live making use of the Macro Variations Control Pack. The first part functions as a how-to guide while the second part presents the contents of the PACK.

Setting Up Macro Variations
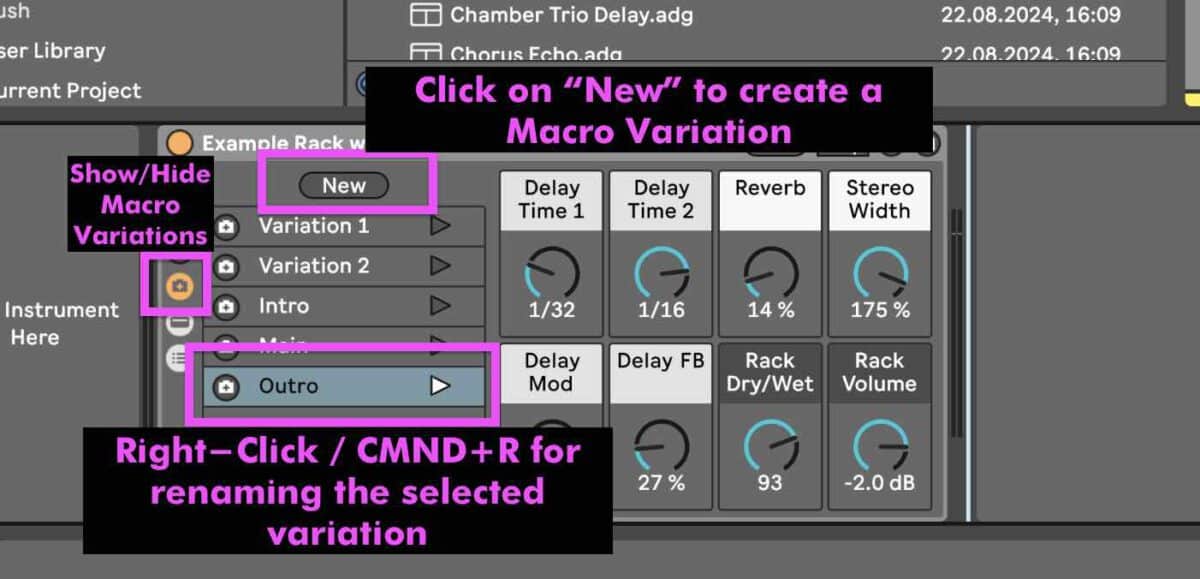
To begin, you need to create and organize your macro variations. In Ableton Live, locate the Device Rack, where you can easily set up new variations. Hit Command + R to rename your preset. By naming your presets, you’ll find it easier to navigate them during a live performance.
How to Control and Automate Rack Presets Variations
Once you set up the macro variations, the next step is to trigger them. Ableton Live’s native MIDI mapping lets you trigger single variations. Selecting variations is possible as well but would need a second MIDI controller input to trigger the selected variation. For automating Macro variations you can use the “Automate Rack Macro Variations” Max for Live device. You will need to map the M4L device” directly to your rack. Just click on “MAP To Rack” and then click on the On/Off button of the Ableton Rack you want to control. This action enables the Max for Live device to take command.
After mapping, create a MIDI clip on the track you have the “Automate Rack Macro Variations” device on. This clip will serve as your automated trigger. Select the envelope section in the Clip View and choose the “Variation Select” in the envelope menu.
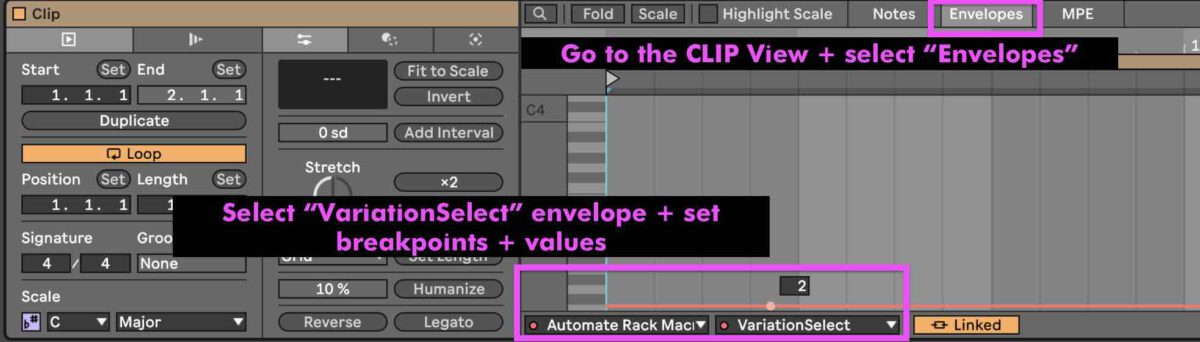
You can name the MIDI clip to keep track of your selected macro variations efficiently.
Demonstrating the Automation
To see your automation in action, play back the MIDI clip you’ve created. As the clip plays, it will change between the macro variations according to the automation settings and break points you’ve specified. You can duplicate your MIDI clip, adjusting values to further showcase multiple variations. This technique proves helpful in live settings where switch-ups can invigorate the performance.
Make sure to check out the full video tutorial below to extend your knowledge!
The Control & Automate Macro Variations Pack
The Control & Automate Macro Variations Pack includes four specialized Max for Live devices designed to help you manage and trigger variations efficiently. This guide will walk you through these devices so you can integrate them into your setup for live performances or studio sessions seamlessly.
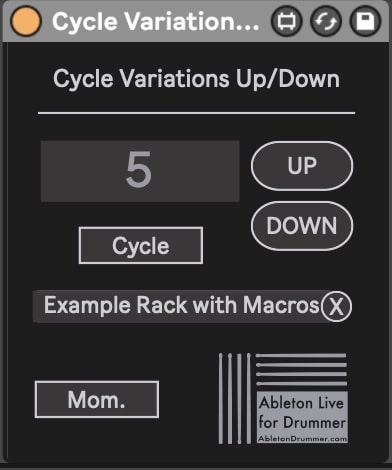
How to cycle up and down through variations in Ableton Live
The first device in this pack is designed specifically for cycling through variations. This allows you to navigate up and down through your micro variations easily. To set this up, enter the MIDI mapping menu and map your MIDI controller buttons to the up and down functions. If your MIDI controller produces MIDI Notes make sure to select the momentary mode, facilitating a smooth cycling experience without the need to double-hit each button. This setup allows you to cycle through your variations effortlessly during live performances.
How to trigger specific variations via a MIDI controller in Ableton Live
The second and third device in the pack focuse on triggering specific variations via your MIDI controller. One is for audio tracks and the other for MIDI tracks. You don’t need to place them on the same track as the effect rack you want to control; they can reside elsewhere within your Ableton set. To utilize the devices, map them to your chosen rack parameter and then assign individual buttons on your MIDI controller to each variation. This setup enables you to jump directly to a specific variation at the press of a button, streamlining your performance workflow.
How to Automate Rack Variations via dummy clips in Ableton Live
The forth device allows for easy automation of your macro variations using dummy clips. This feature is particularly useful when you want a specific variation to be triggered at a predetermined point in your arrangement. To set it up, map the device to your rack and create a dummy clip in your session. Within the dummy clip, you can set breakpoints that dictate which variation to trigger at specific times. This automated switching is incredibly helpful for creating dynamic and evolving soundscapes without manual intervention during your performance.
For the in-depth presentation of the devices check out the video below.
In closing, the Control & Automate Macro Variations Pack comprises four powerful Max for Live devices designed to optimize your control over macro variations in Ableton Live. From cycling through variations and triggering specific ones to automating changes with dummy clips, each device offers distinct functionality that you can tailor to your specific performance needs. By incorporating these tools into your workflow, you will improve the flexibility of your live setups!


