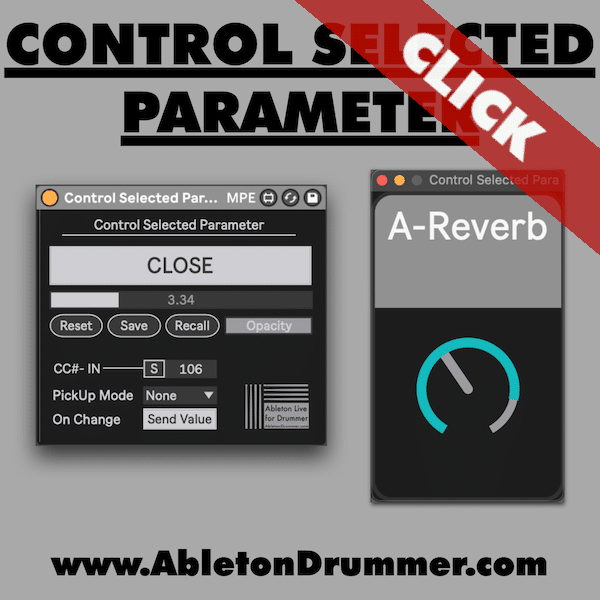
Enhancing your workflow in Ableton Live becomes easier when you control selected parameters using a MIDI controller. Instead of manually adjusting parameters with your mouse, a MIDI controller lets you tweak them seamlessly, giving you a hands-on approach to music production. This guide will show you how to set up and use a Max for Live device to dynamically control the currently selected parameter without encountering frustrating value jumps.
How to Control the Current Selected Parameter in Ableton Live via MIDI Controller
To get started, ensure your MIDI controller is ready. Devices like the Akai LPD8 or Behringer X-Touch Mini work well for this purpose. Next, load the Max for Live device designed for parameter control onto a MIDI track. If you use Ableton Live Suite, Max for Live is included, for Ableton Standard M4L is available as an add-on. Ableton Intro + Lite can’t use 3rd party M4L devices.
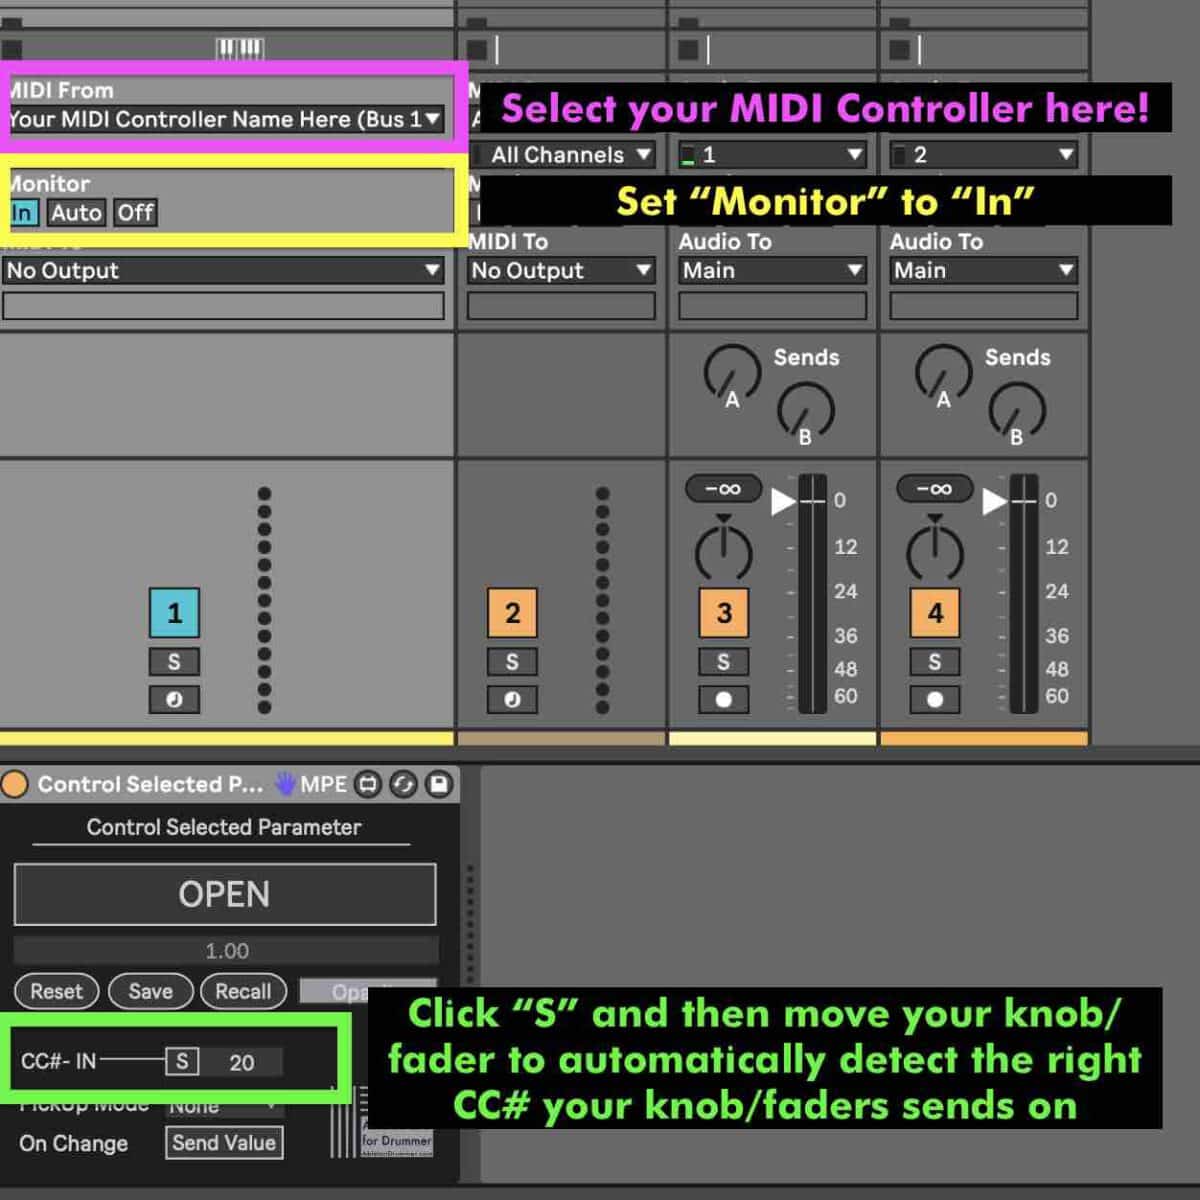
Once loaded, a resizable popup window will appear when you click on “OPEN”, allowing you to monitor and manage parameter selections. Route your MIDI controller to the track and set the monitor mode to ‘In’ so that MIDI data flows continuously. Then, map your CC MIDI message from your knob or fader by pressing the ‘S’ key. Move a knob or fader on your controller, and it will automatically detect to the MIDI CC number it is sending values on.
Now, whenever you select a new parameter, such from an audio effect or filter cutoff, the controller will instantly control it. This dynamic mapping system prevents manual reassignments, making your workflow more efficient.
How to Fix Value Jumps with MIDI Controllers in Ableton Live
One common issue with MIDI mapping in Ableton Live is parameter value jumping. When you switch between parameters, the controller’s physical position might not match the newly selected parameter’s value, leading to abrupt changes.
To fix this, the Max for Live device offers a built-in scaling mode. This ensures that your controller’s current position translates proportionally to the new parameter’s value. Instead of jumping to extreme values, the transition feels smooth and controlled.
Additionally, some MIDI controllers support high-resolution encoders, which prevent drastic jumps by offering finer value adjustments. If your controller has endless encoders, set them to send relative MIDI CC messages from 0-127 like most controllers do.
How to Use Pick-Up MIDI Control Mode for the Currently Selected Parameter in Ableton Live
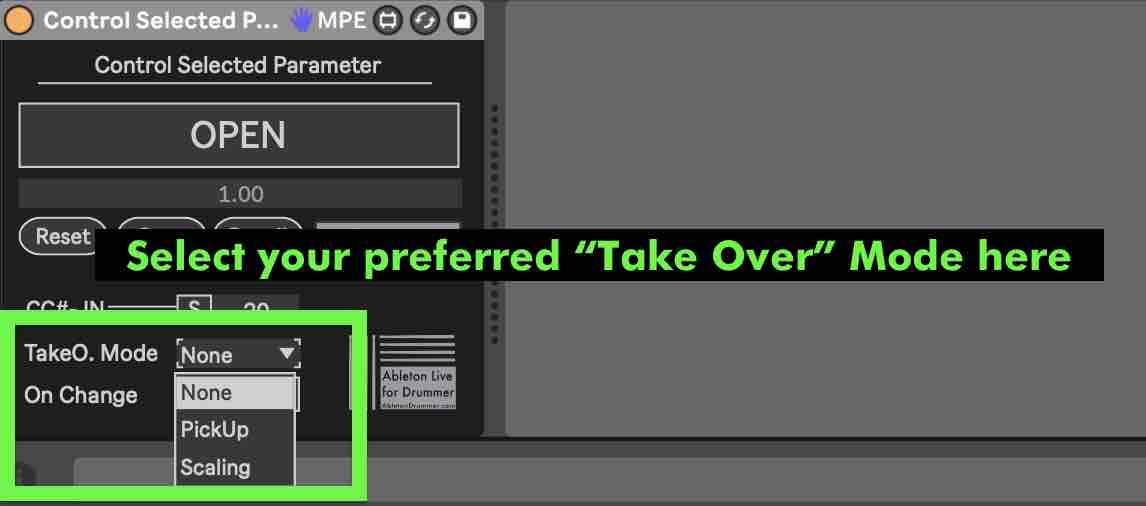
Unfortunately Ableton Live set “Take Over” modes like ‘Pick-Up’ and “Value Scaling” to work globally for all MIDI Mappings. Those modes prevent value jumps when switching between the control of parameters. The “Control Selected Parameter” works independent from Ableton’s Live Take Over mode and overcomes this limitation. You are able to set up the “Pick Up” mode which means a parameter will be only controlled if your physical MIDI knob/fader matches the current value of the currently selected parameter. Just select “Pick Up” on the M4L device for getting this control behaviour.
Limitations of Dynamic MIDI Mapping in Ableton Live
Although dynamic MIDI mapping significantly improves workflow, it does have limitations. Some toggles, such as device on/off switches, have a specific way to react to MIDI CC messages: 127=ON + everything else=OFF. This means for turning a toggle button ON would require moving a dial or fader ‘all the way up’. Additionally, certain third-party plugins may not fully support real-time parameter switching as they might not have been made accessible to the Ableton Live API for MIDI mapping.
Another challenge arises when using standard MIDI controllers with sending only increase/decrease values instead of a full value range of 0-127 CC. But as mentioned before: Advanced Controller usually have an editor software to change this. You are able to send out MIDI CC values for the currently selected parameter as well. When using MIDI controllers with endless encoders this will set those to reflect the state of the (newly) selected parameter. For further information make sure to check out the video tutorial below:
Using the “Selected Parameter Control” M4L device with pickup mode and scaling options offers a more intuitive way to control parameters in Ableton Live via a MIDI controller. With the right setup, you can enjoy a smoother, hands-on production experience without interruptions.


