

Live looping with Ableton Live has become a quite big thing for instrumentalist and vocalist. During the pandemic music performers were able to practice social distancing and music making on the same time. Long before the pandemic live-acts like Marc Rebillet, DubFX, Rachel K Collier and Binkbeats (to name a few) were already doing incredible live-looping performances for years.
But starting out with live-looping in Session view has a few steps to take. I developed a Max for Live device which provides a straight-forward and accessible concept for live loop performances with Ableton Live. The One Button Live Looper.
How to do Live Looping in Ableton Live?
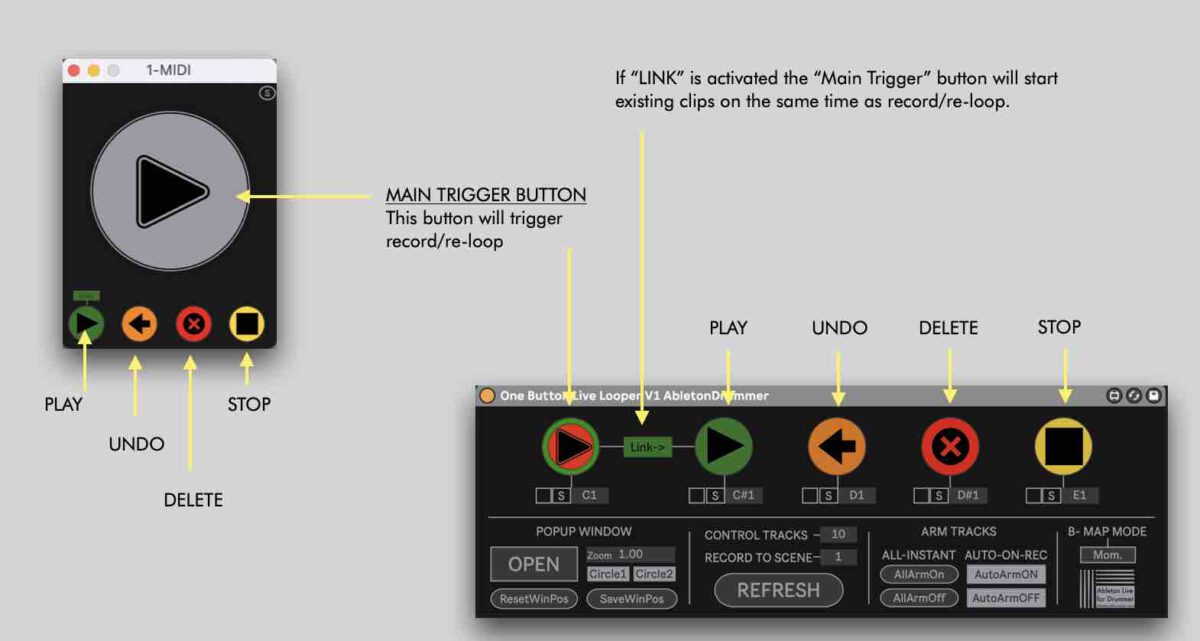
There are various techniques for live-looping with Ableton Live. Understanding and setting up all the possible options here can be quite overwhelming, especially when you starting out. Many live-loopers are using the BOSS RC-505 or similar dedicated hardware loopers. The hardware provide one straight concept: Press one button to record + press it again to loop. The One Button Live looper replicates this approach.
Here is a quick-start video, which explains how to use the template provided:
Why is the “One Button Live-Looper” an easy and user-friendly solution for live-looping with Ableton Live?
- MIDI MAP buttons or foot pedal of your midi controller for all the actions required for live-looping
- control recording and re-loop via pressing ONE MIDI button or foot-pedal
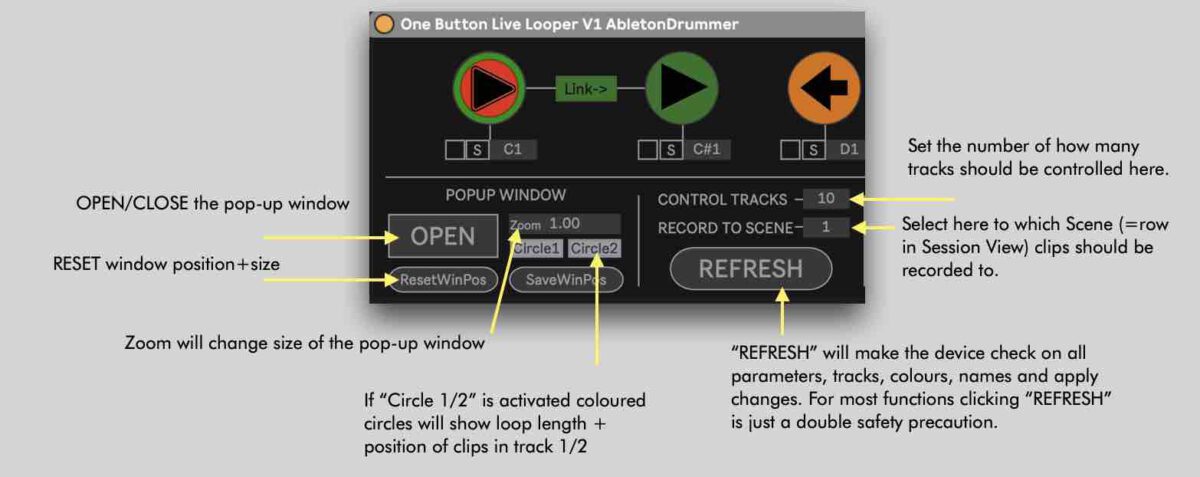
- get visual feedback via changing colours in a (resizable) pop-up window for recording, re-looping and loop-lengths
- record up to 10 layers / clips with one looper device
- quick access to UNDO and CLEAR the recordings
- record your whole live-loop performance and edit each layer individually afterwards
- set up looping presets and controls and re-call those for different projects quick and easy
- control audio and midi recordings via one looper device
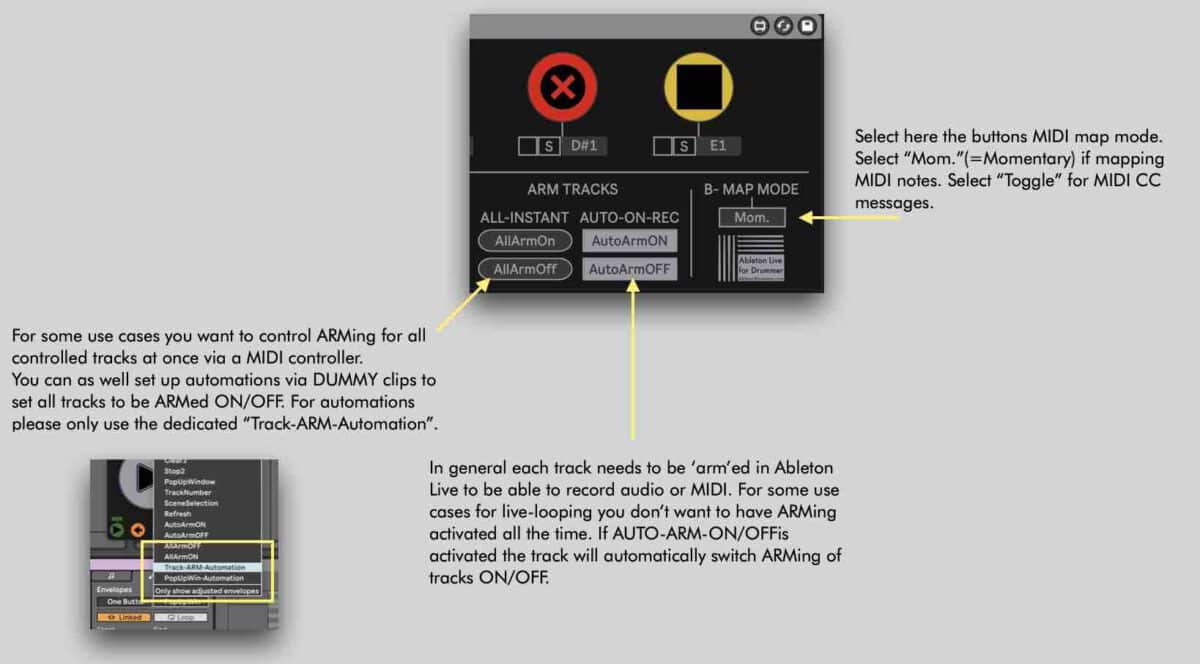
- set ARM On and Off when recording automatically
- set up as many loopers as you (and your system) can handle
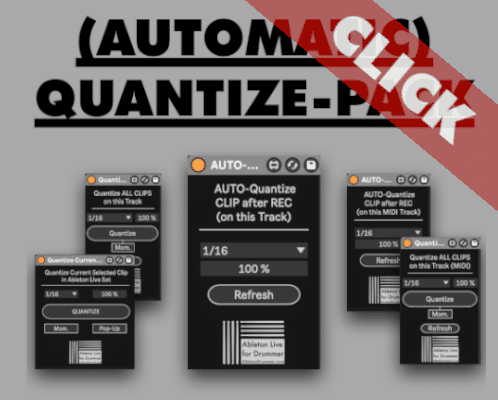
Besides this looping device I have and will release more Max for Live devices which come handy (not only) for live-looping Ableton Live via clips. For example if you want to determine a pre-set recording length for your loops, you want to check out my “Fixed Clip Length” pack here. and you want to check the “Automatic Quantise” plug ins I made as well.

Video Manual for live-looping with Ableton Live
To understand all functions and the set-up concept of this One Button Live Looper – Please watch the full video run-through manual:
One Button Ableton Looper Manual
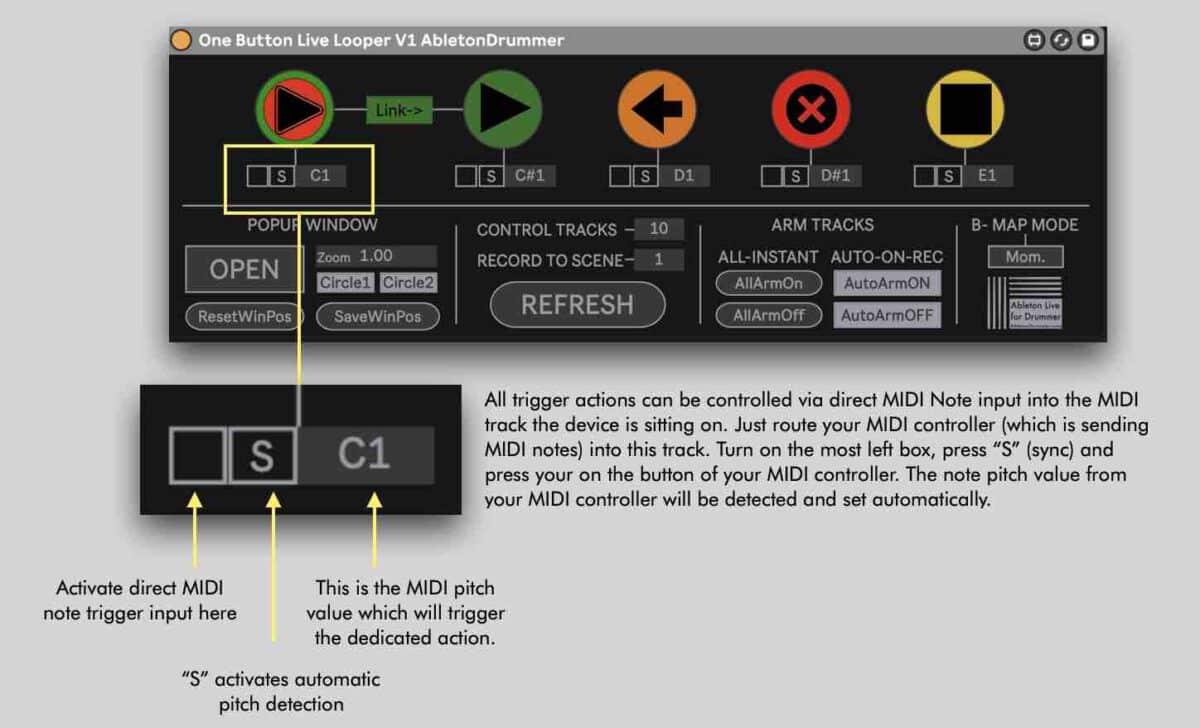
The One Button Live Looper Max for Live (M4L) device controls recordings + looping of “clips” in Ableton Live’s Session View. The M4L device needs to be placed on a MIDI track in Ableton Live. It will then control ‘the following’ tracks to the right. The maximum number of tracks which can be controlled is 10. They can be MIDI and/or Audio tracks. The number of tracks need to match the number of the “CONTROL TRACKS” box to work correctly. Functions like recording, loop, play, stop, delete and stop can be controlled via the main device or via the pop-up window.
MAKE LOOPS NOT WAR!
Here is presentation from live-looping artist Reinhardt Buhr about how he is using the One Button Ableton Looper. He was using my BETA version of the One Button Live-Looper for Ableton Live for gigs already and shows how it can be used.
