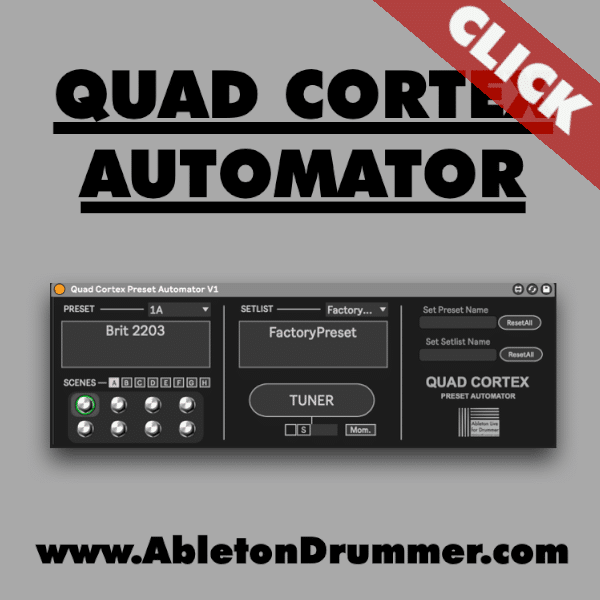
The Neural DSP Quad Cortex (get yours here!)* is widely used on stages around the globe in addition with Ableton Live. Presets of the QuadCortex can be changed via MIDI. This way you are able to have the right guitar sounds and effects being selected automatically. Unfortunately sending Program Changes from Ableton Live and sending the right MIDI CC can be a bit tedious to set up. To make things easy I developed a Max for Live device which let’s you set up automations for your Quad Cortex quick and easy. Just click on the image below and read this guide on how to set up the Quad Cortex with Ableton Live.
How to set up a Midi connection from Ableton to the Quad Cortex
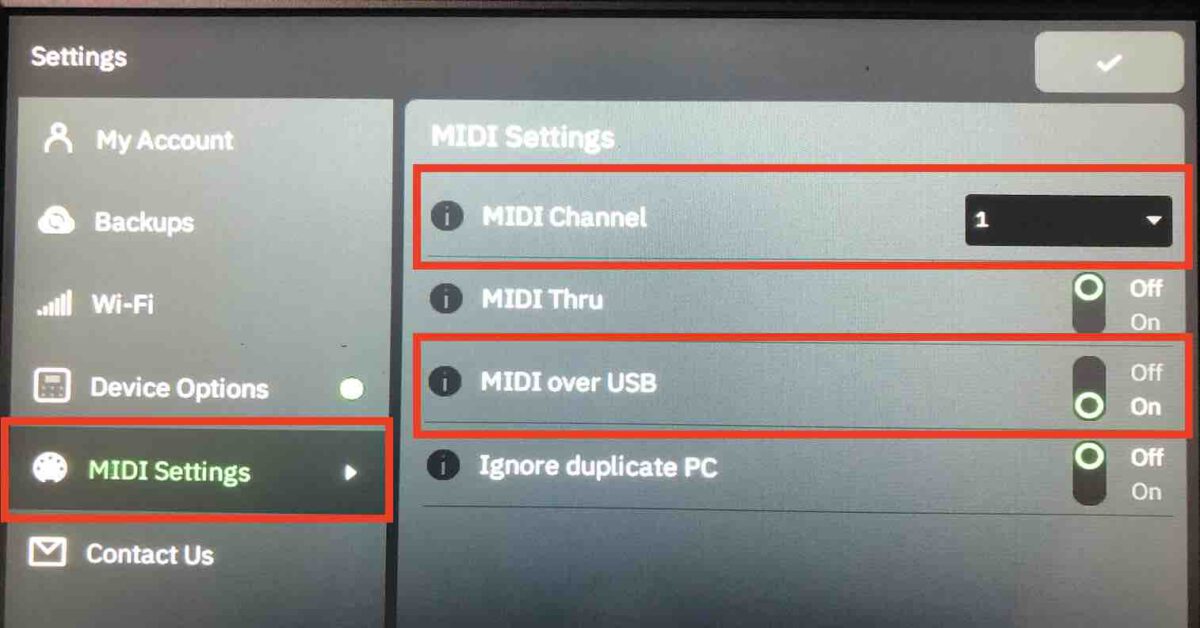
The Quad Cortex will receive “MIDI over USB” on Channel 1 per default. Please check the MIDI settings and change them if applicable You will find the “Midi Settings” under “Settings” on your Quad Cortex.
First you have to make a MIDI cable connection between your computer and your Quad Cortex. A USB MIDI connection is the easiest to set up. You can as well use a MIDI 5-pin connection TO the MIDI IN of your QuadCortex. The 5 pin MIDI connection makes sense if you have longer distances between your playback computer and the Neural Quad. You will need to activate the “TRACK OUT” port for the Quadcore or the relevant 5 PIN MIDI port. I always advice to only activate the needed MIDI in and outs ports. De-activating unused MIDI ports will minimise the chance to run into unwanted MIDI routing and MIDI loop back issues.
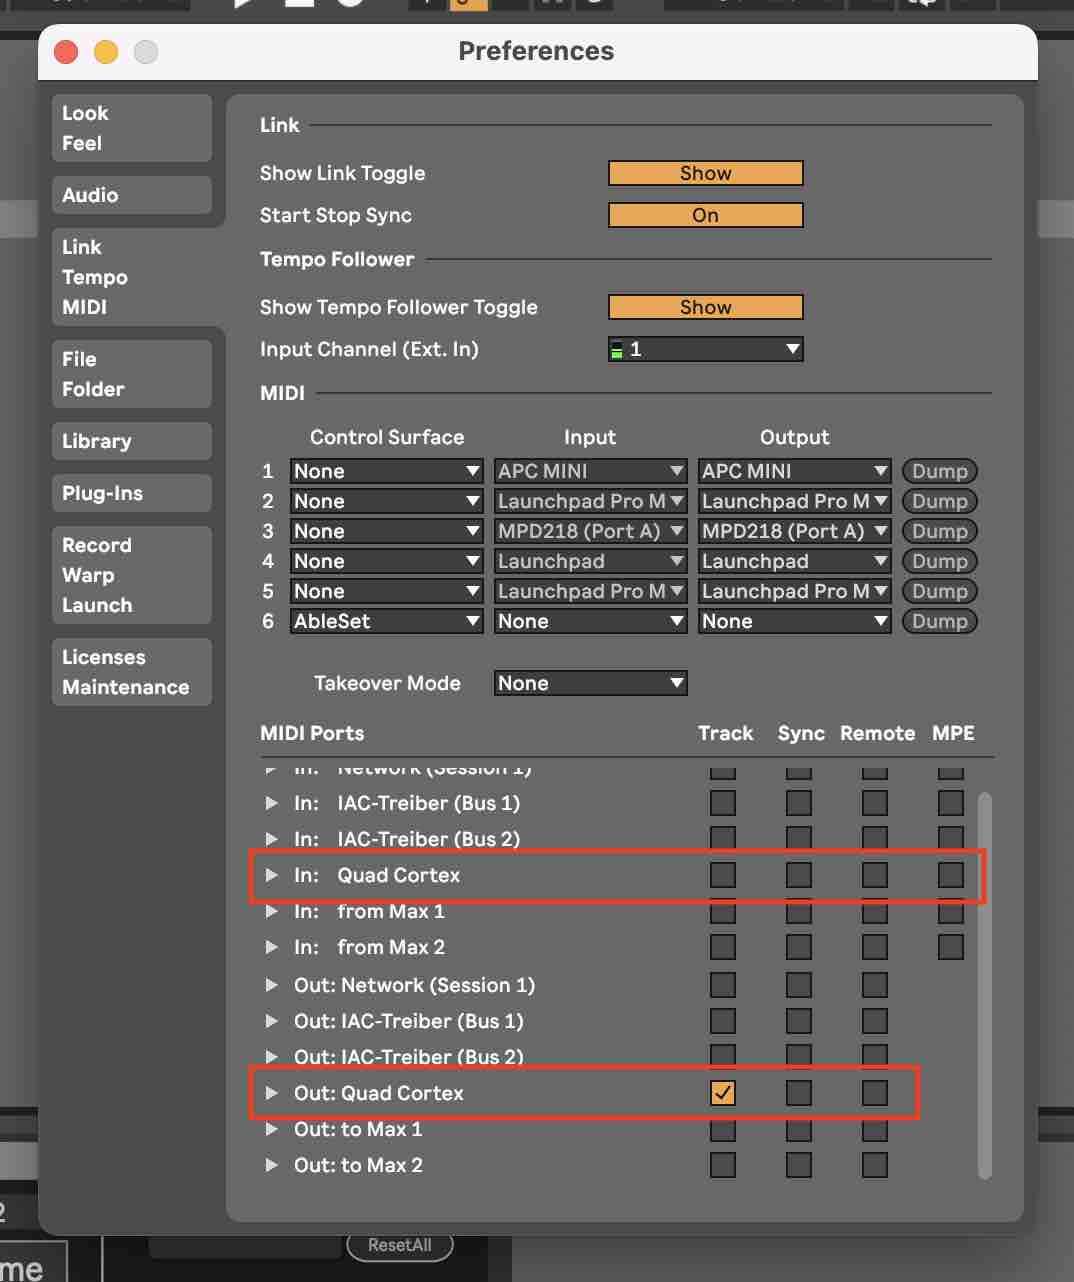
Set up MIDI routing from Ableton to the Neural DSP Quad Cortex
Just create a new MIDI track in Ableton Live and set the “MIDI To” of this track to “Quadcortex”. If you are using a different MIDI connection you will need to set the MIDI To accordingly. Please make sure to set the MIDI Channel to “Ch. 1” (Channel 1). If you changed the receiving MIDI Channel on the Quad Cortex you obviously need to set the MIDI track to send on this MIDI channel.
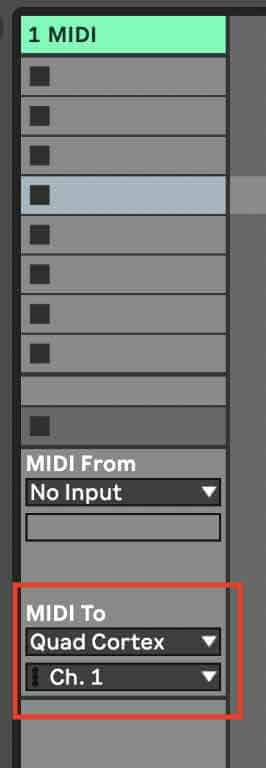
Please make sure that you have “No Input” under “MIDI From” selected. It makes sense to keep MIDI in and outs as clean as possible.
How to access presets on the Quad Cortex via Ableton Live
You are now able to place the “Quad Cortex Automator” Max for Live device on this MIDI Track. You can select different presets and scenes under the according menus and buttons. This way you can check if all your MIDI connections are working and set up right.
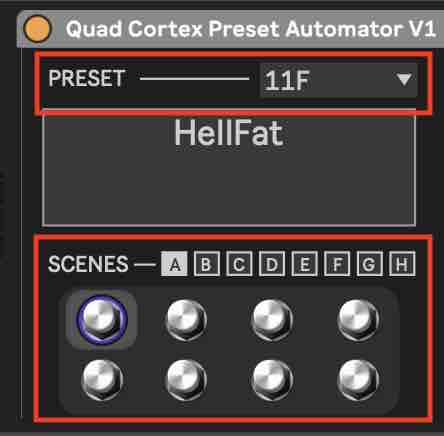
If the presets and scenes on your Quad are changing you are now able to set up automatic presets and scene changes.
How to set up Automations in Ableton Live Session View
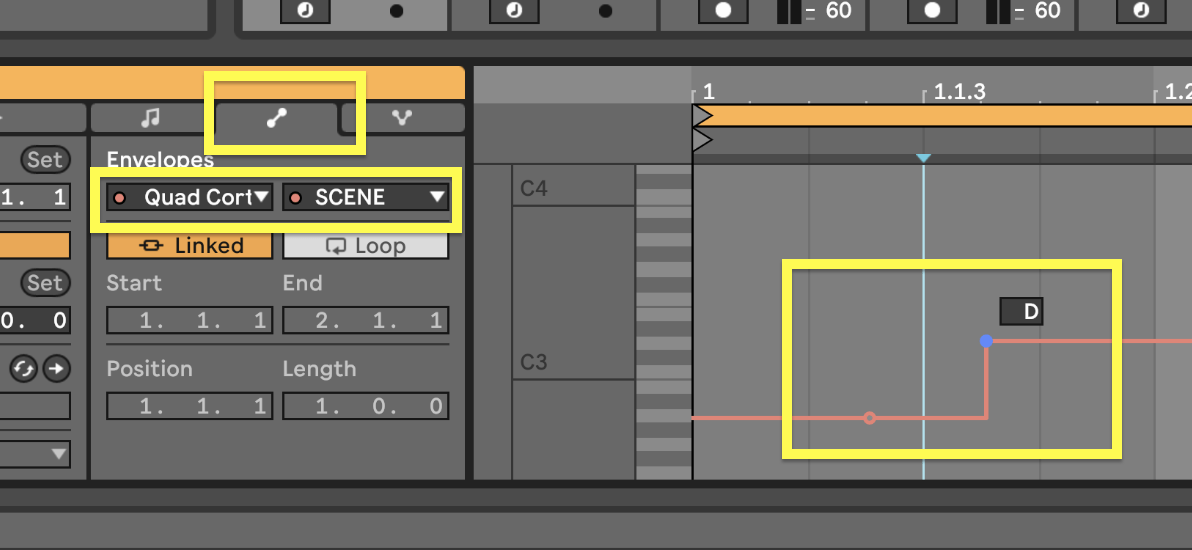
You can set up automations in Ableton Live’s Session View and Arrangement View. If you are in Session View you will need to create a MIDI Clip and open the “Envelope View”. You will need to select the parameter you want to automate in the menu. You can set breakpoints via click on the red line and set the breakpoint to the value(s) you want to be selected when this clip is playing.
How to set up Automations in Ableton Live Arrangement View
You first need to activate the “Automation Mode” in Ableton Live’s Arrangement View. Select the parameter via the automation menu and set breakpoints via click on the red line. You are able to change the values of a breakpoint via “click+move up/down”. You are as well able to select “Edit Value” when you right-click on a breakpoint. Unfortunately you are only able to put in numbers when choosing “Edit Value”.

The Quad Cortex Automator Max for Live device
With the “Quad Cortex Preset Automator” Max for Live device you are able to quickly set up automatic changes of presets and scenes in Ableton Live. Your sounds and effects will change automatically according to the song and parts you perform. Please watch the full-run-through video below where I explain all steps for setting up the Quad Cortex with Ableton Live. In this video I explain:
- How to set up a MIDI Connection between Quad Cortex and Ableton Live
- How to activate Quad Cortex MIDI Port in Ableton Live
- How to route MIDI TO the Quad Cortex from Ableton Live
- How to create automatic preset and scene changes on Quad Cortex with Ableton Live
- The Preset + Scene Concept of the Neural DSP Quad Cortex
- How to change Names and reset Names for Quad Cortex Automator
- How to activate the Quad Cortex Tuner via Ableton Live
- How to automate changes of Scenes after Preset Changes on Quad Cortex
*affiliate link
More Max for Live devices for Ableton Live’s Arrangement and running tracks
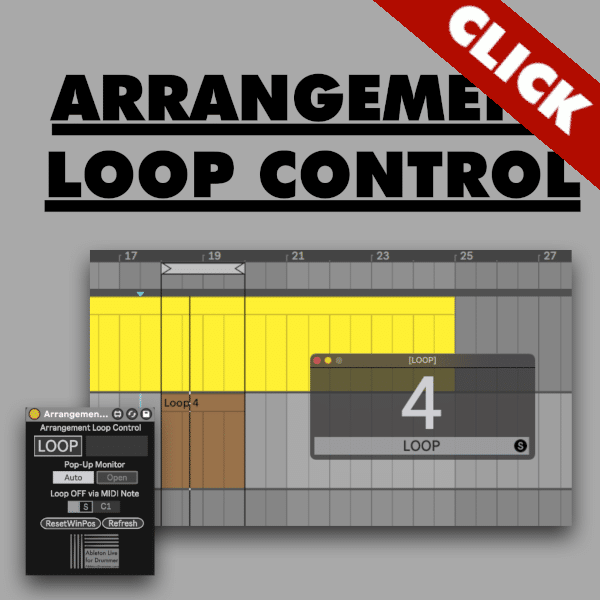
I have released several Max for Live devices for different use cases. One of this use case is running tracks and backing tracks for live performances. Below you will find some devices which are great for automating loop sections and stopping and jumping to the next song. You are able to check out all of my Max for Live devices here.

