
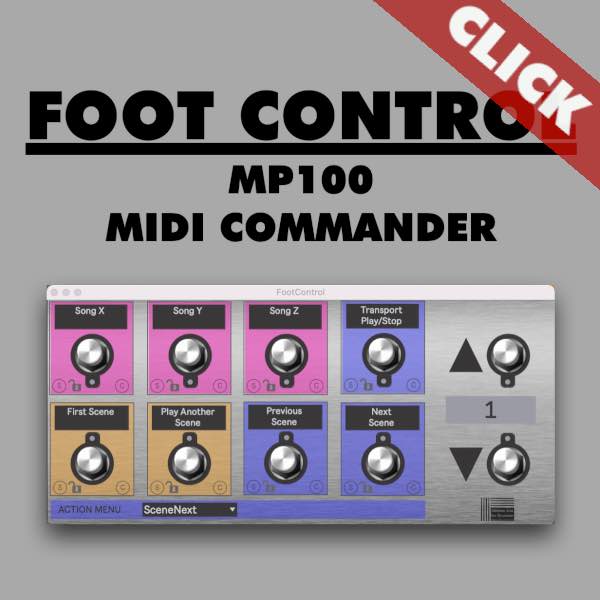
In the fast-paced world of live performances, having precise control over your equipment is crucial. Imagine using your MP-100 with Ableton Live to control various settings, presets, live-looping and mappings dynamically during your set. This dream is now a reality, thanks to a groundbreaking Max for Live device. In this comprehensive guide, we’ll explore the ins and outs of this innovative tool, providing you with the knowledge to elevate your live performances.
The Harley Benton MP-100 and the MeloAudio MIDI Commander are the same pedal and just have different names. There are some MP-100/Midi Commander versions on the market which won’t work as they don’t have the “SCN-7” preset. Please check on your pedal if you have the “SCN-7” preset (explained below in “Step 3”). If present you can use the MeloAudio MIDI Commander to control Ableton Live the same way like described here for the MP-100.
Setting Up Your MIDI Environment :
Step 1: Acquire the MP 100 with Ableton Live Max for Live Device
Before diving into the magic, ensure you have the Max for Live. Max for Live is included in Ableton Live Suite. If you have Ableton Live Standard you would need to get Max for Live as an add-on. You then would need to buy the MP-100 Foot Control Max for Live device. It is compatible with Ableton Live 12, 11 and Ableton Live 10. Install the Max for Live device in your User Library and simply drag and drop the device onto an empty MIDI track to get started.
Step 2: MIDI Configuration in Preferences
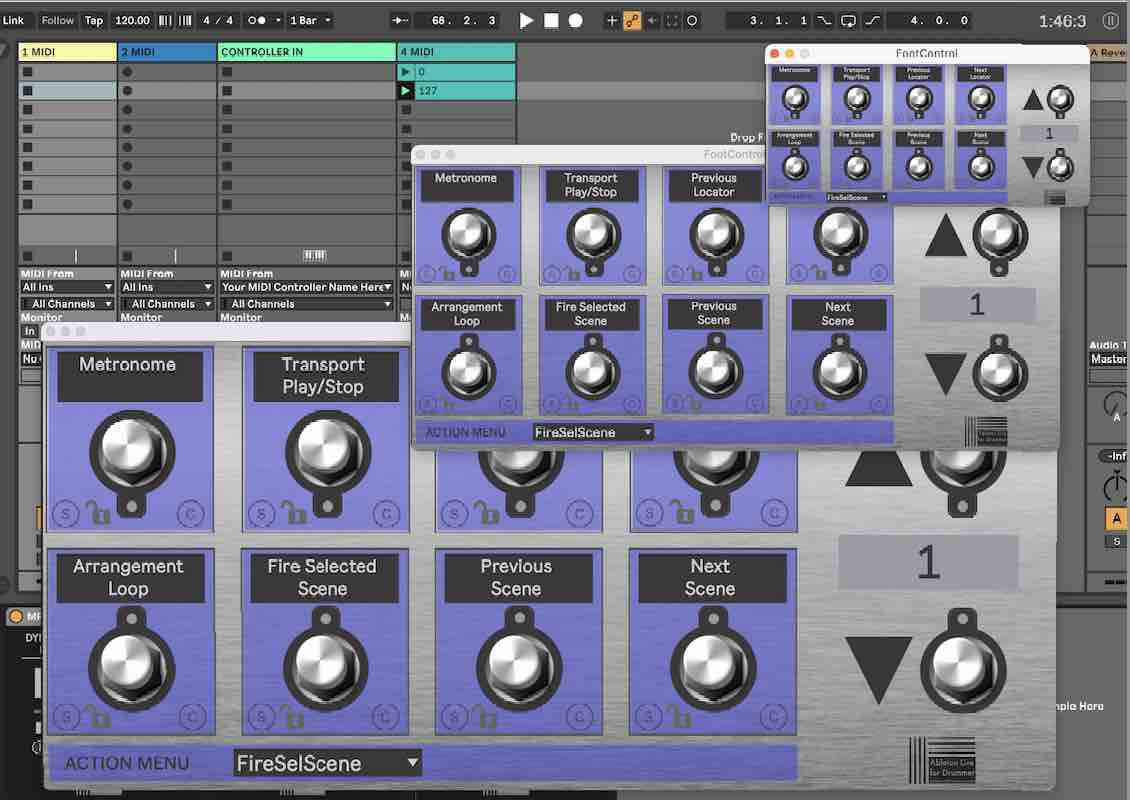
Configure your preferences in Ableton Live to receive MIDI from your MP100 or MIDI Commander. Select the appropriate port (USB or 5-pin MIDI connection for larger stages and distances) in Ableton’s MIDI preferences. Activate the “Track” under the “IN” section for the appropriate MIDI port.
In Ableton Live create a MIDI track and select the MP 100 in the “Midi From” menu. Make sure to set the track monitor to “in” and deactivate the output port to avoid unintended commands.
Step 3: MP100/MIDI Commander Internal Presets
Set your MP100 or MIDI Commander to its internal preset “SCN-7”:
- turn the MP-100 off
- press and hold stomp pedal “A” while turning the MP-100 back on
Your MP-100 will now display “SCN-7”.
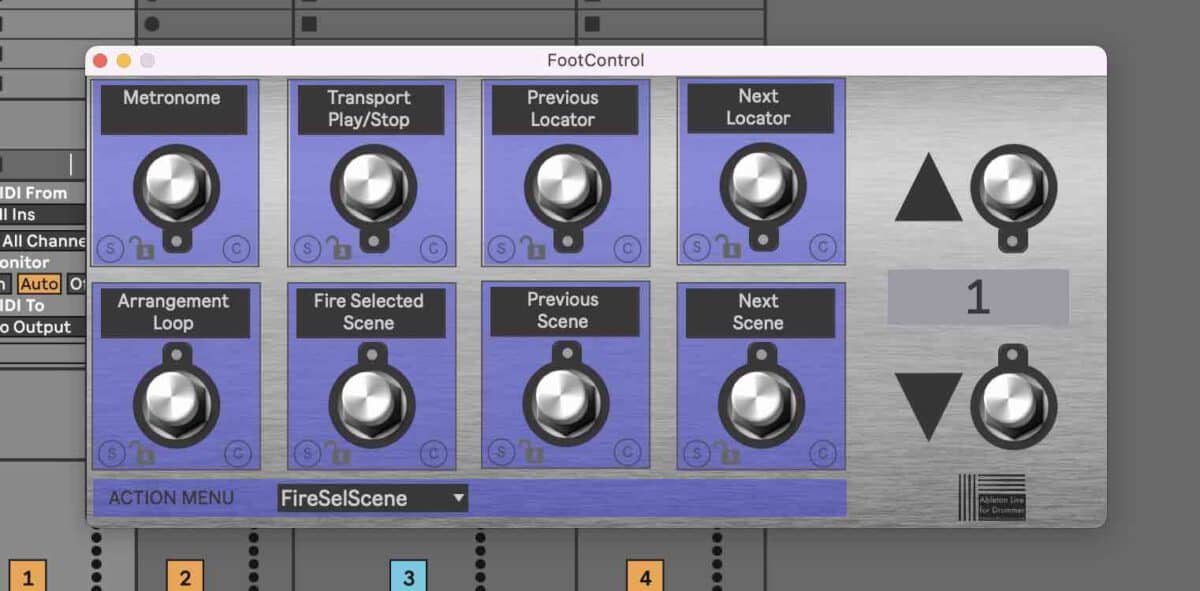
Practical Application: Dynamic Mappings and Presets for MP 100 with Ableton Live
Step 4: Action Menu Setup
Navigate the Max for Live device’s intuitive interface. Set up actions using the action menu, enabling you to control various aspects of your live set.
Step 5: Global Controls and Presets
Discover the power of global controls. You can set up presets that apply universally, ensuring consistent actions across different settings. This feature is particularly useful for managing scenes, locators, and even global controls like track on/off. Once you have set up Global Controls on the M4L Foot Control device, you can store this as a preset in your Ableton User Library. You can just drag and drop the M4L device your User Library located in the Live Browser.
Step 6: Mapping Parameters
You are able to map parameters dynamically using this Max for Live device. You can bind parameters like track on/off and volume to specific buttons, providing a versatile approach to live performance control.
Step 7: Note Mapping for Live Looping
Explore the note mapping feature for live looping. You are able to set up presets for sending different Note Pitch. MIDI notes can control the One Button Live Looper for enhancing your live looping experience.
Advanced Features and Tips for MIDI Foot pedal control with Ableton Live
Step 8: Saving and Recalling Presets for MP 100 with Ableton Live
Discover how easy it is to save and recall presets. You can drag and drop the Max for Live device into your Ableton User Library, allowing you to effortlessly reuse your configurations in future Ableton Live sets. Note that this will only work for the Global Actions like Start, Stop, navigating Scenes and Locators in Ableton Live. Customised single parameter MAPping in Ableton Live are always particular settings to a particular Ableton Live set.
Step 9: Customizing Interface Position
Learn how to customise the interface of the MP 100 Ableton Control Plug-in for your convenience. You can resize and save the position of the Max for Live device’s popup window, ensuring a tailored setup that suits your performance environment.
Conclusion on the MP 100 with Ableton Live Control Plugin:
The Footcontrol for Ableton Live M4L device opens up a world of possibilities for MP100 and MIDI Commander users. From dynamic mappings and presets to global controls and advanced parameter mapping, this tool is a game-changer for live performers. Elevate your performances and take full control of your set with this affordable and powerful MIDI foot controller for Ableton Live.
Please check the video manual for additional infos on functionality and setting up the MP100 and MIDI Commander with Ableton Live:


